Click on the topic you want to learn more about, alternatively scroll down the page.
Introduction #
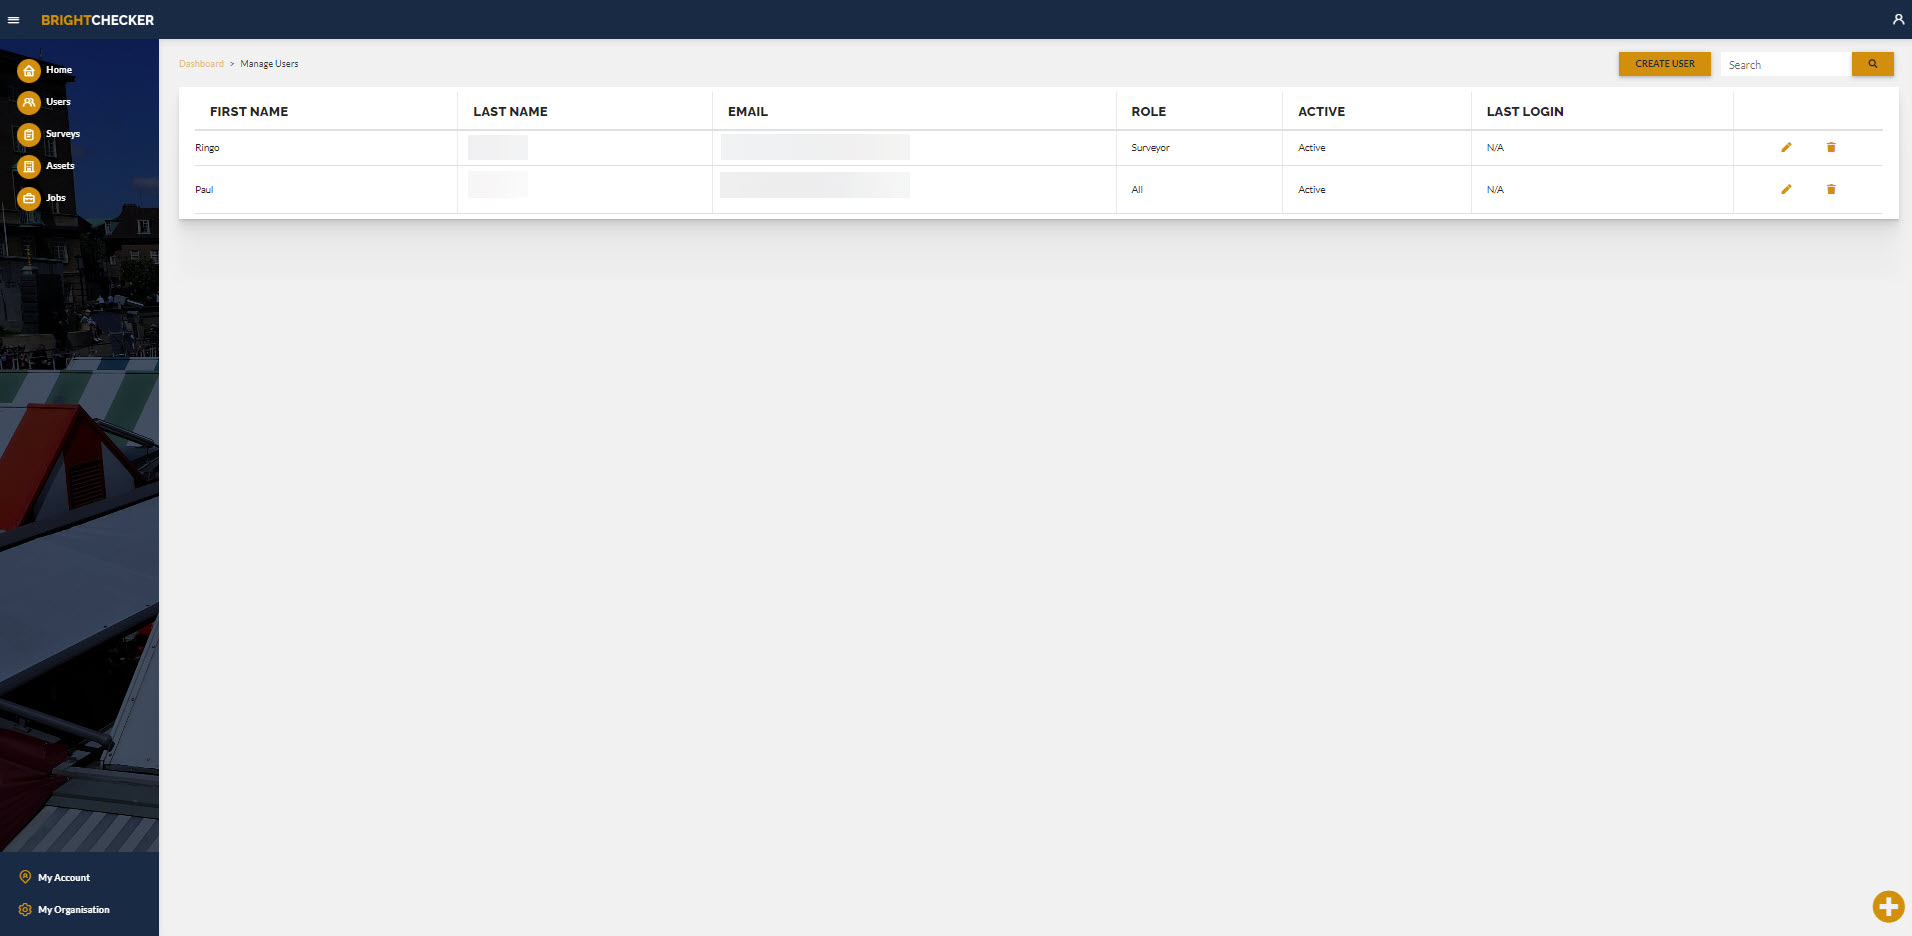
The user’s screen displays information about users:
- First Name
- Last Name
- Role
- Active
- Last Login (where the user has not yet logged into the system this will show ‘n/a’)
Important Note: The User Screen does not include your user details. That is accessed via the Main Menu ‘My Account’ option.
In the screenshot below last names & Email addresses have been greyed out for privacy reasons…
Add User #
From the ‘Manage Users’ screen, there are two ways to add a user.
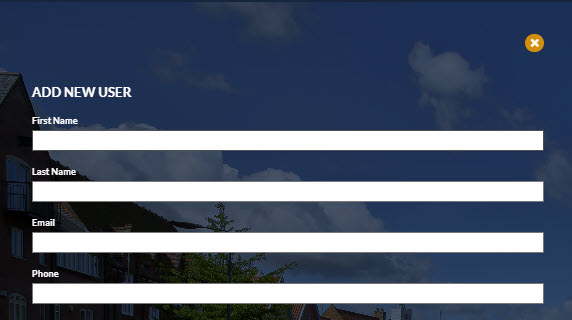
- Click the Create User button that is located top right.

- The ADD NEW USER sidebar opens. Click the x button to close the sidebar if it was opened by accident.
Part 1: Enter the following details in the sidebar:
- First name
- Last name
- Email (must be unique to this user)
- Phone Number
Part 2: Click on the role box. There are more roles than can be shown in the drop down box.
Use the scroll bar in the drop down box to see all the roles
- Organisation Admin
- Operations Management
- Surveyor
- Survey Builder
- Report Builder
- Report Generator
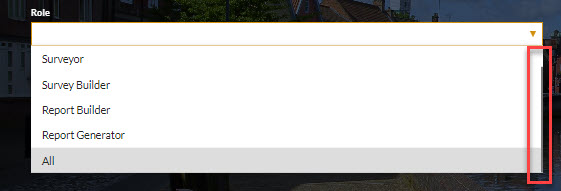
You can also use your keyboard’s up and down keys to scroll up and down.
Further Role explanations appear in 7.2 ROLES, RIGHTS & PERMISSIONS
Click ‘add user’ once all selections have been made.
![]()
- Alternate way to add a User. Click the round orange and white ‘+’ symbol.
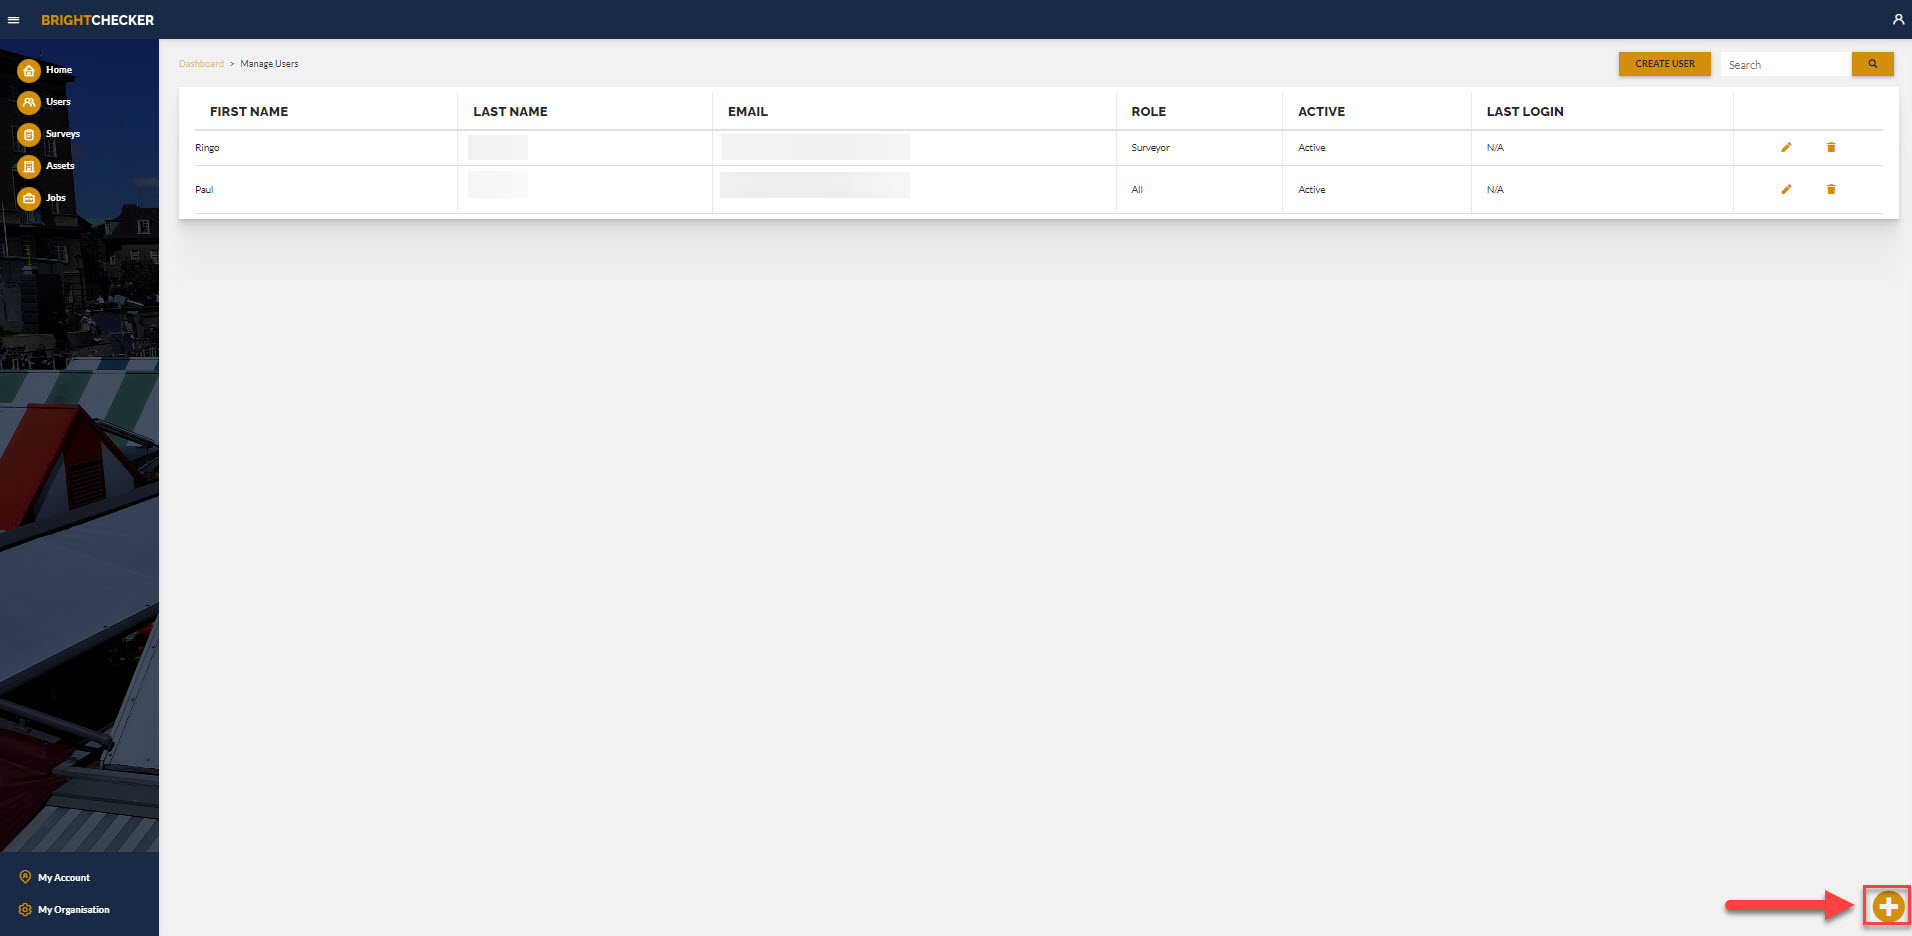
- The ADD NEW USER sidebar opens. Click the x button to close the sidebar if it was opened by accident.
- Follow add user instructions above.
Deactivate A User #
Do you want to deny a user access to the Brightchecker Dashboard or App?
From the ‘Manage Users’ screen:
- Click on the pen icon to the right of the user.
- Click the Active Button
- Click ‘Update’.
As a result the User can no longer access Brightchecker.
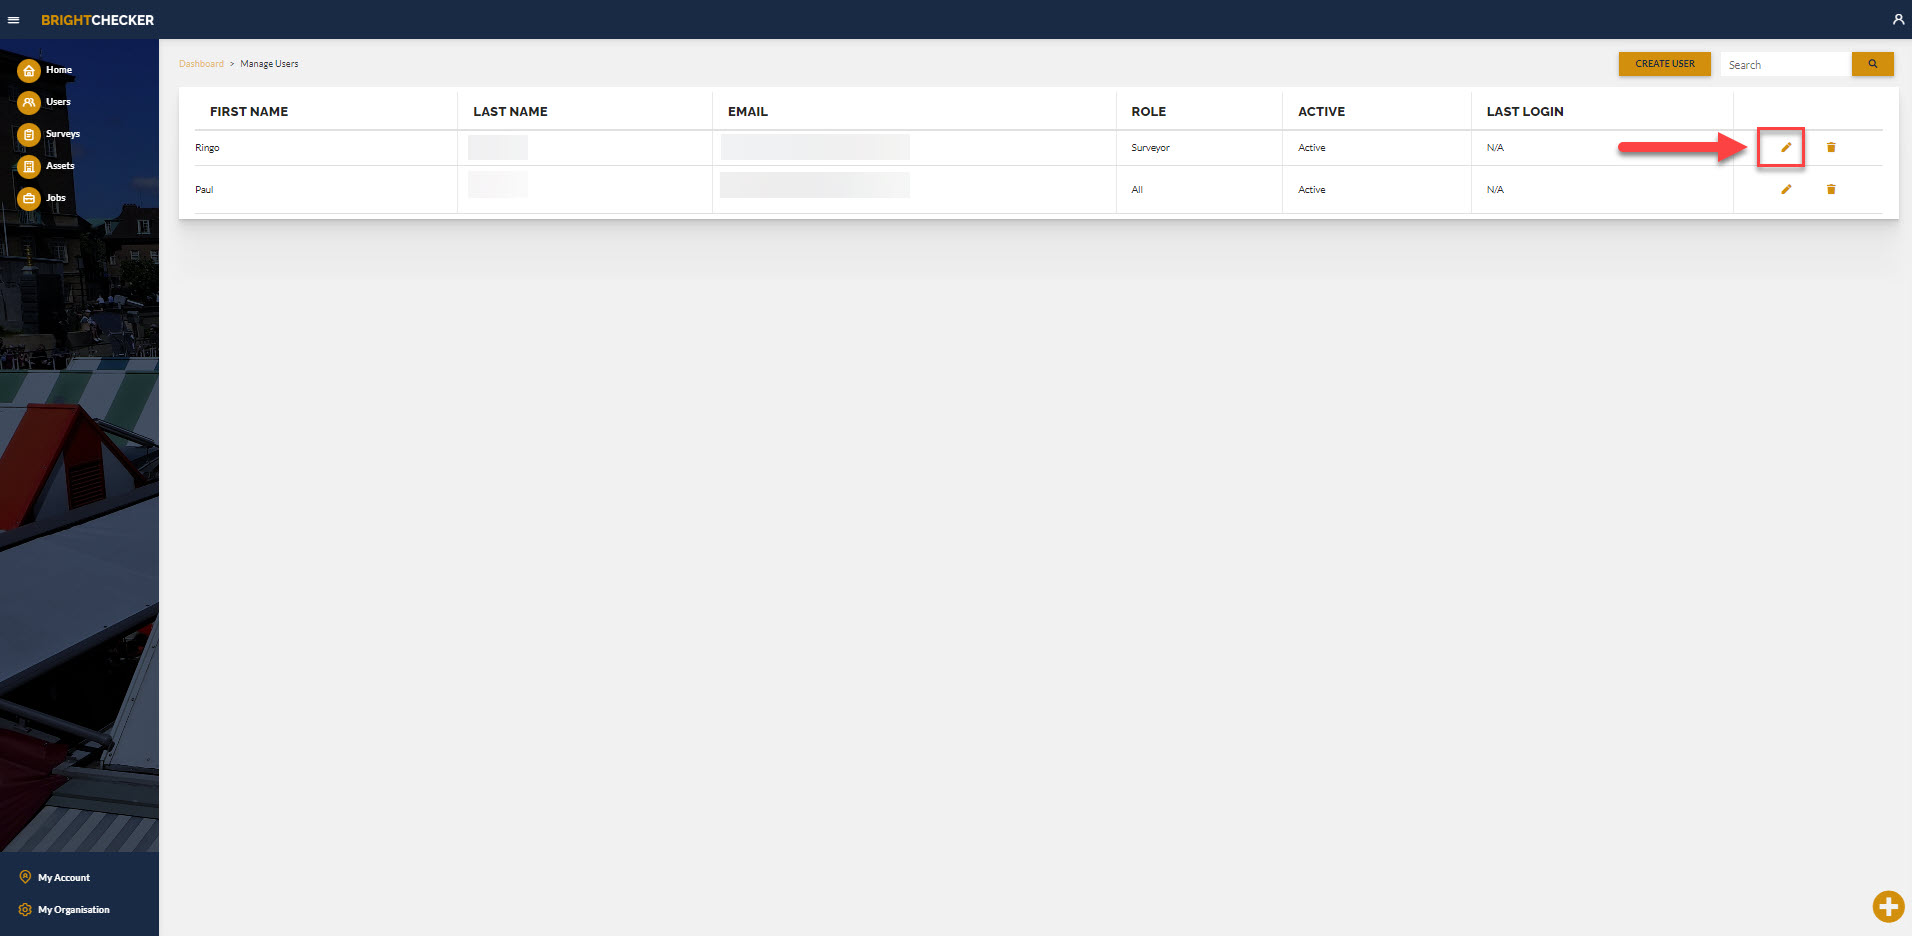
Edit A User #
From the ‘Manage Users’ screen:
- Click on the pen icon to the right of the user.
- Make your changes.
- Click ‘Update’.
Delete A User #
Deleting or removing a user from your Brightchecker Organisation can have a very significant impact on your records.
In most instances just deactivating a user is sufficient (and much safer). See Above for instructions on how to do this.
If a user has created survey templates etc. in the system then deleting the user also means that the system can no longer show or access these.
However, if you are determined to delete a user then this is how you do it.
From the ‘Manage Users’ screen, find the relevant user.
- Click the bin icon to the right of the applicable user, to delete a user.
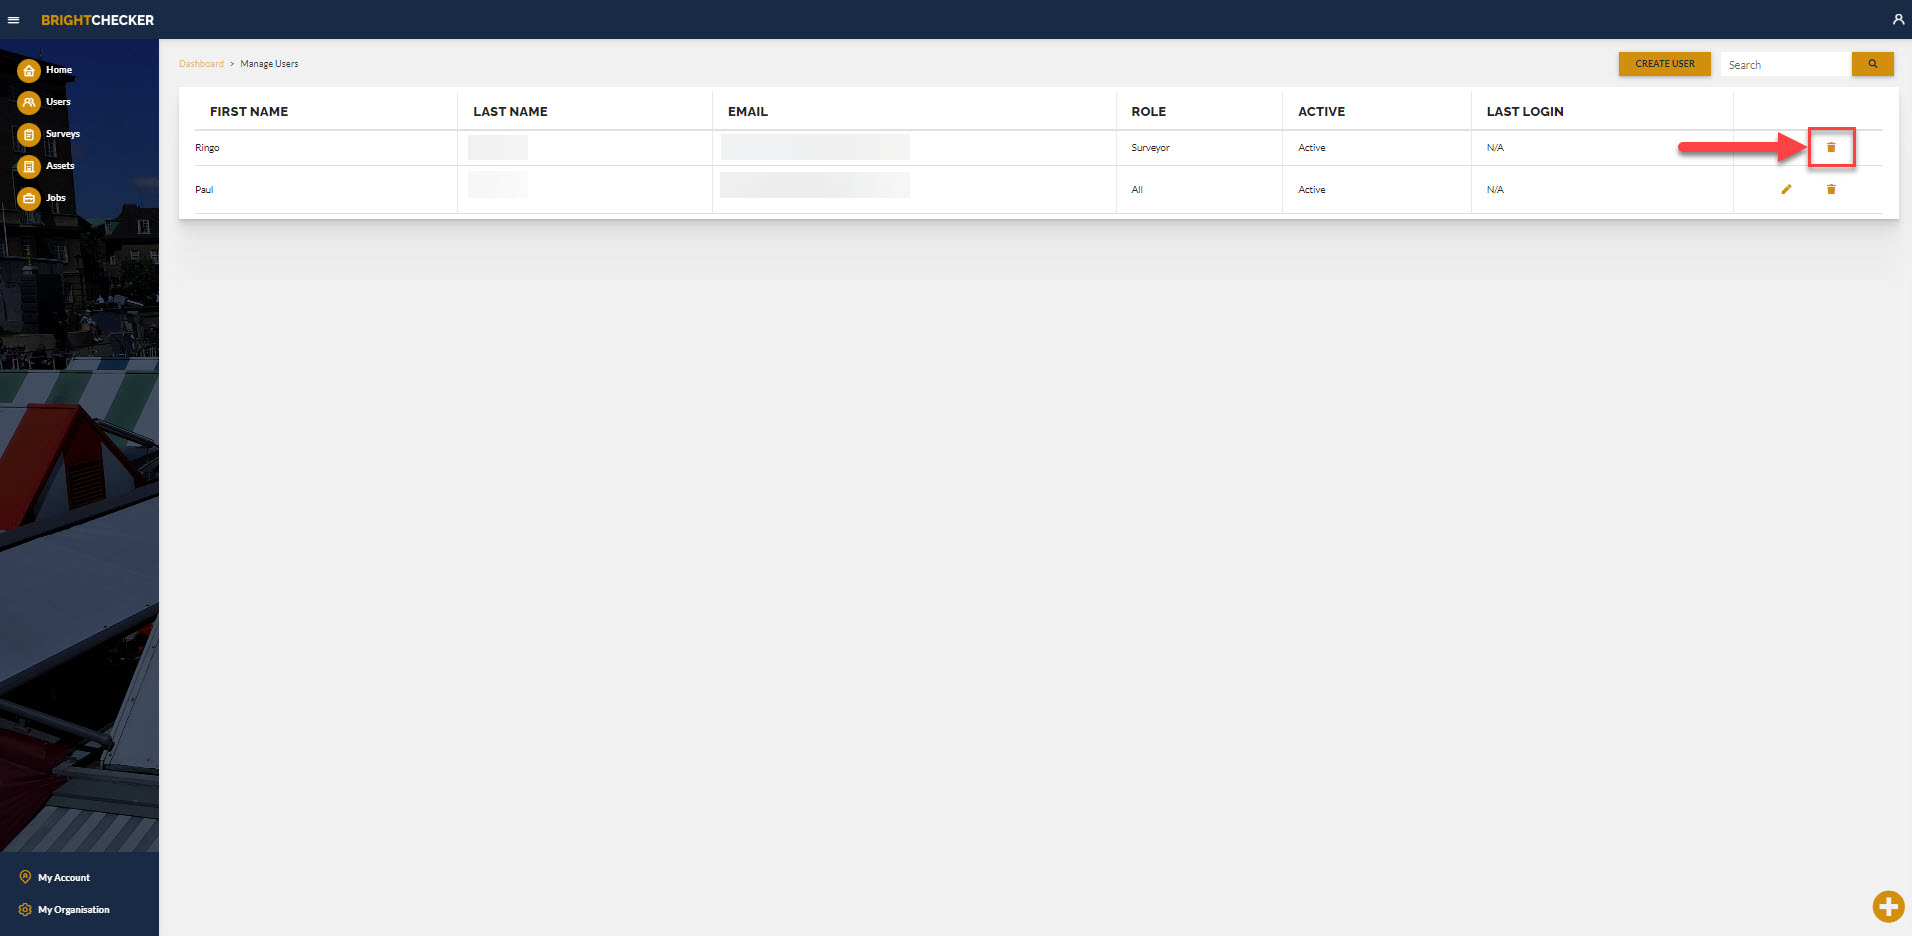
- Click ‘Yes’ when you see ‘Are you sure you want to delete the user’. The user is permanently deleted.
- Click ‘cancel’ if you do not want to delete the user.