Click on the topic you want to learn more about, alternatively scroll down the page.
Click/Tap #
As the app is designed to be used with either a touchscreen device or a mouse/touchpad/keyboard system, Click/Tap is used in the instructions to indicate a user selection/action.
See Every Item Associated With A Section #
Swipe items up & down to see all items associated with a section.
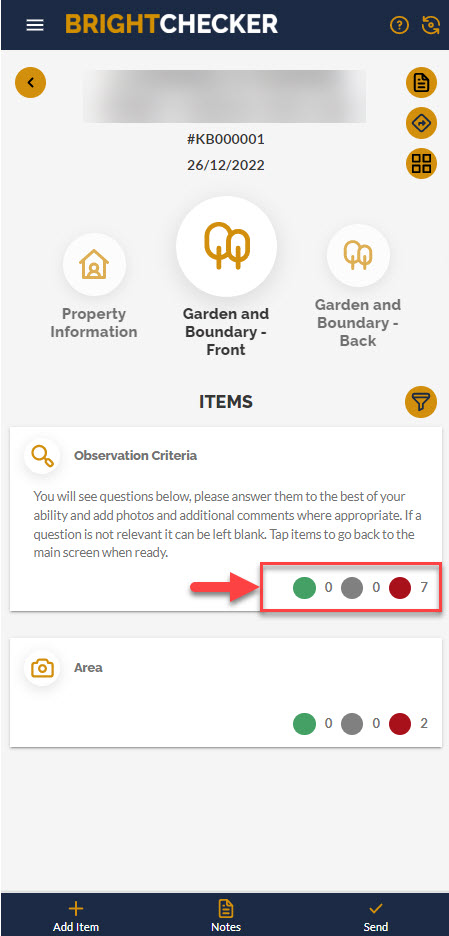
Question Balls #
Each item has a set of question balls. Each ball has a number.
- Red ball number = required questions with no response.
- Grey ball number = recommended questions with no response.
- Green ball number = all questions (of any type) with a response.
Item Ticks #
If all required questions in an item have a response, a green tick will appear.
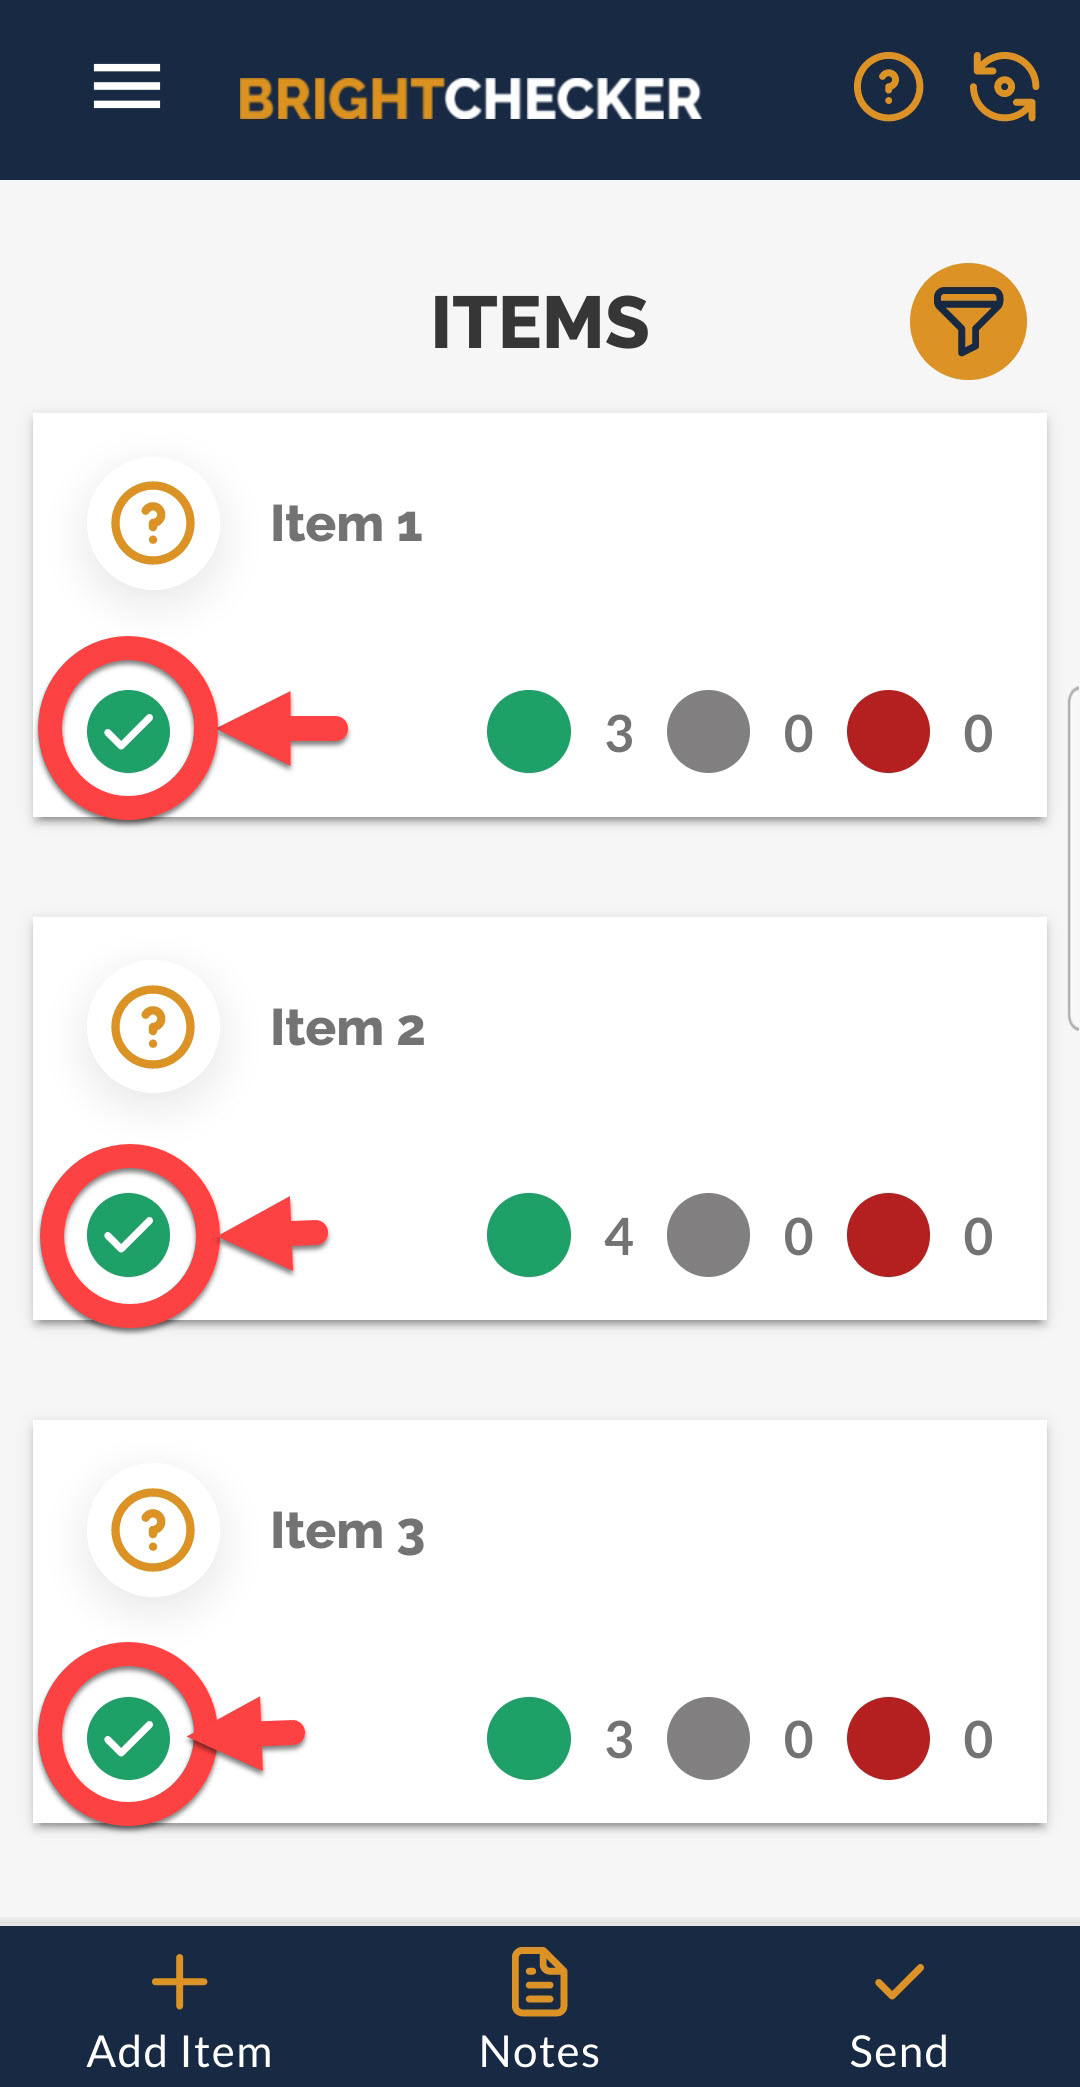
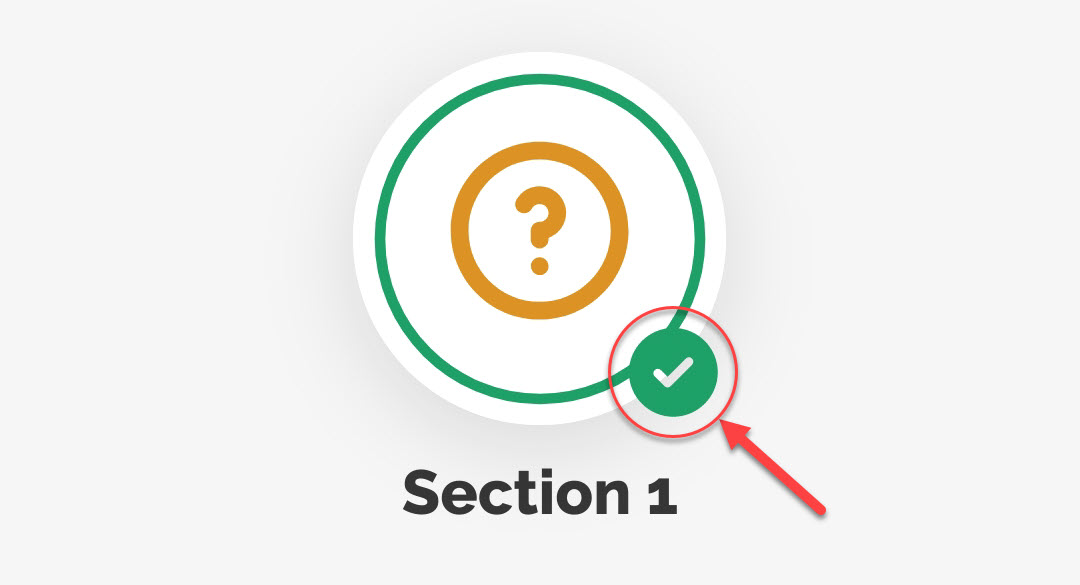
Section Ticks #
If all items in a section have a green item tick, a green section tick will appear.
Select An Item (to interact with item questions) #
Tap/Click on an item. The item screen opens.
- The item title appears at the top of the questions. If supporting item photos and additional text are present these will also be displayed.
- Questions appear in sequence underneath.
- Swipe questions up and down to see all questions.
- Interact with the questions as appropriate.
Add An Item (and put it into any section of your choice) #
From the section / item screen
- Make sure that you are on the section with the item that you wish to copy.
- Tap/Click the ‘+ add item’ footer option. The add item screen opens.
- Tap/Click ‘Select an existing item…’. The items from this section appear in a list. Only items that can be copied will be shown.
- Tap/Click on an item name.
- Tap/Click on the Set item name box, if you want to set the new item’s name
- Tap/Click ‘Save’
- Tap/Click the box underneath ‘section to add to’. A list of sections appears.
- Tap/Click the section to which you wish to copy the item.
- If you wish to remove an item photo, Tap/Click on that photo.
- If you wish to remove a question, Tap/Click on that question.
You now have a choice
Choice 1:
- Tap/Click ‘save’ to create your new item. The add item screen is closed and you return to the section/item screen.
Choice 2:
- Tap/Click ‘Save & Add Another’ to create your item, and then add another exactly like it. You cannot rename it, or delete questions.
- Tap/Click the box underneath ‘section to add to’. A list of sections appears.
- Tap/Click the section to which you wish to copy the item.
- Tap/Click ‘save’ or click ‘Save & Add Another’ to add another exactly like it.
Cancel Adding An Item #
From the add item screens
- Tap/Click the footer ‘Cancel’ to stop adding an item.
Questions & Notes #
Recommended & Required Questions #
Recommended and Required Questions are highlighted with their respective headers.
Question Text & Guidance #
Question text appears first. Guidance text appears underneath question text. Please note that guidance text will not appear in the final report.
Free Text #
The respondent can capture a free text response. The single-line box is ideal for short responses. If your phone supports dictation, then use this as an alternative to typing.
Multiline Text #
The respondent can capture a free text response. The multi-line box is ideal for longer responses. If your phone supports dictation, then use this as an alternative to typing.
Add Main Photo #
- Tap/click on the camera icon to add a main photo.
- Follow camera instructions.
- Once the photo thumbnail appears, tap/click on the photo to inspect it.
- Tap/Click ‘X’ to stop inspecting the photo.
- To delete the photo click the bin icon.
Signature #
- Tap/Click on ‘open signature’
- As a result the signature box appears
- Trace your signature with your finger/left click and hold mouse
- Tap/Click on ‘save’
Yes / No question #
- The respondent can interact with a simple yes/no toggle.
- Tap/click on the toggle to change it N.B. Do not swipe across the toggle.
- Please note that only a yes is considered a response if a question is set to respond to ‘required’
Number Question #
- The respondent can capture an integer.
Decimal
- The respondent can capture a number with a decimal.
Single Choice #
- The respondent can select a single response from a set of answers.
- Scroll down the list of answers to see them all (as they may not all fit on the initial screen)
- Tap/click on a single response.
Multiple Choice #
- The respondent can select one or more responses from a set of answers.
- Scroll down the list of answers to see them all (as they may not all fit on the initial screen)
- Tap/click on one or more responses.
Red Amber Green Question #
- The respondent can select a ‘red’ ‘amber’ ‘ green’ answer.
- Tap/click on one option.
Slider #
- The respondent can drag a sliding ball across a scale and as they do so a value will appear.
Stepper #
- The respondent can drag a sliding ball across a graduated scale and as they do so a value will appear.
Star Rating #
- The respondent can make a response via a star scale.
- Tap / click on the star scale you need.
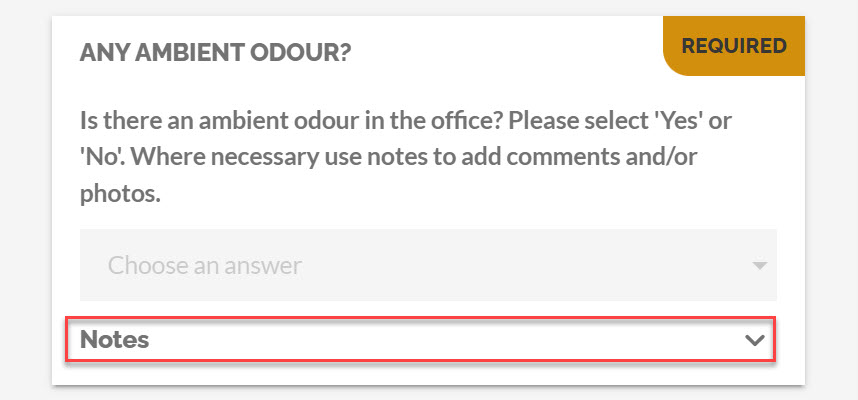
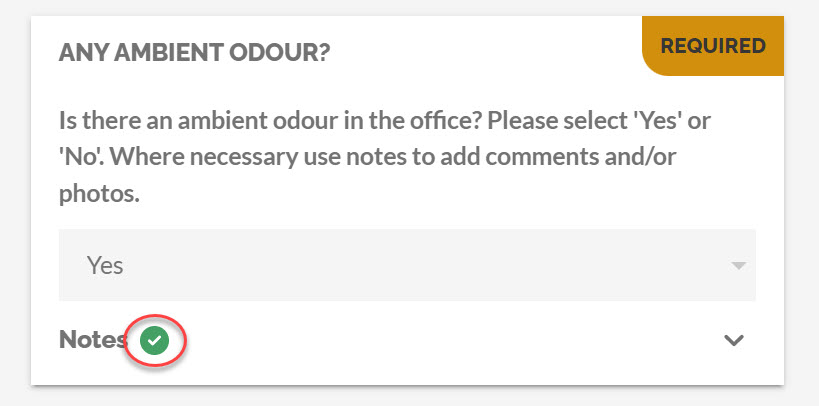
The Notes Feature #
- The question ‘Notes’ feature offers the capability to enter text and photos in addition to the main question type itself.
- Its availability is determined buy the question notes option when the survey was created/edited. So not every question will have a ‘Notes’ feature.
- If it is available the word ‘Notes’ will be visible under the main question.
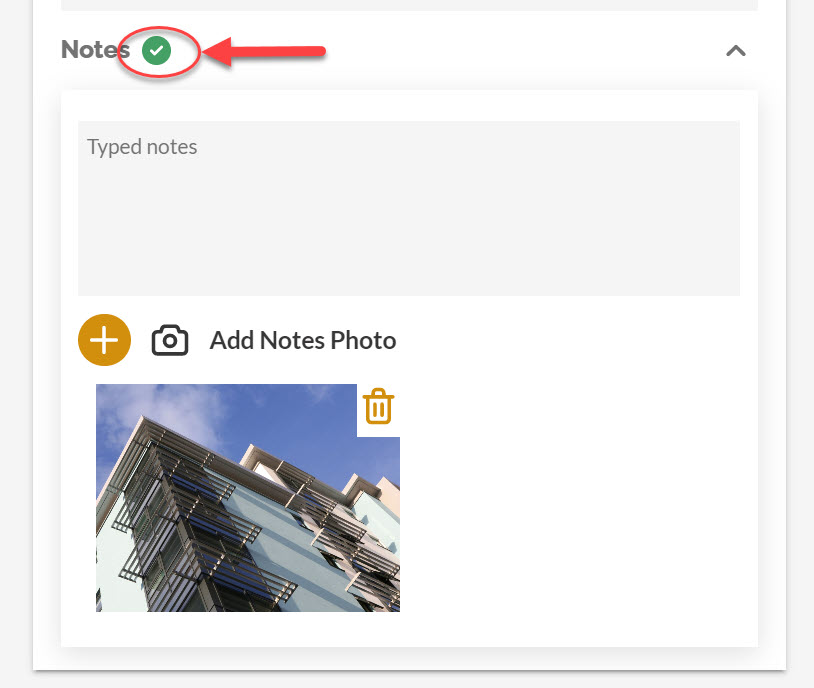
- Tap/ click on ‘Notes’ or anywhere to its right.
- As a result the notes box will appear.
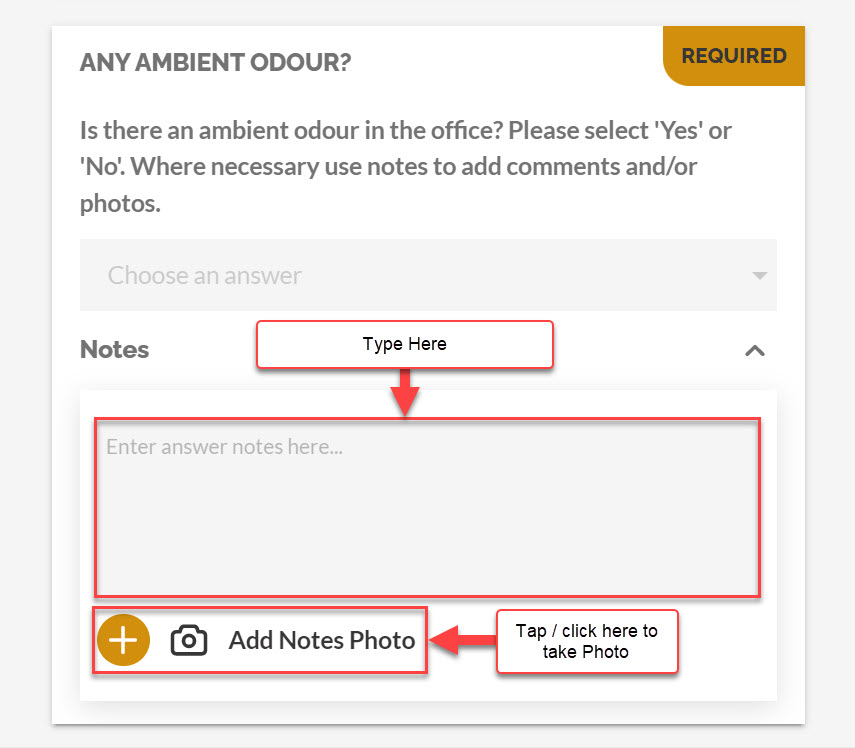
- Enter text in the text box to make written notes.
- Tap/click on the camera icon to take or upload one or more photos.
- Tap/click photo thumbnail to enlarge/inspect the photo. Take care not to tap/click the photo bin icon.
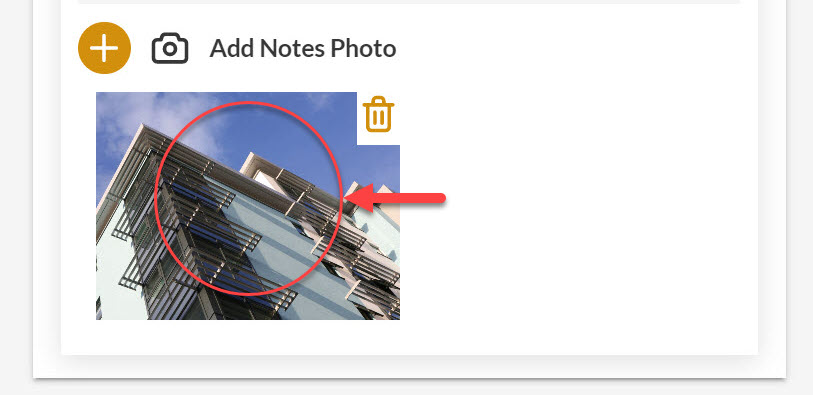
- As a result an enlarged version of the thumbnail will be shown
- Where there are two or more photos tap/click on the ‘<‘ and ‘>’ arrows to move through the photos
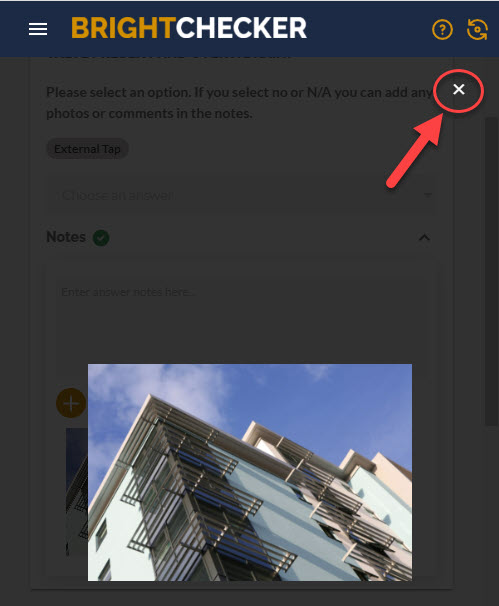
- Tap/Click ‘X’ to stop inspecting photo(s).
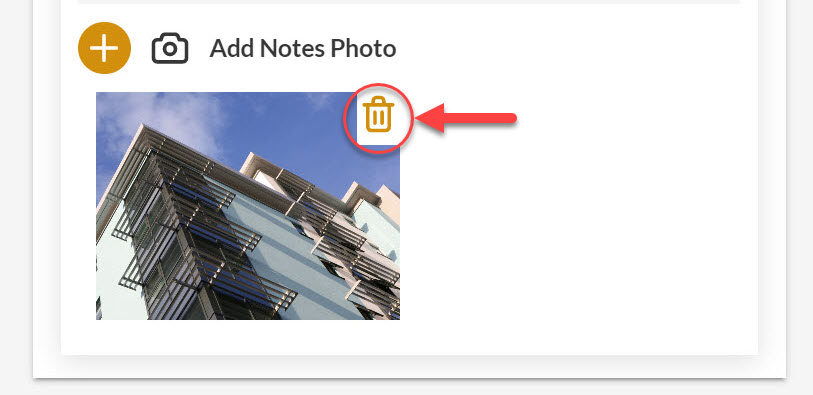
- To delete a photo tap/ click the photo bin icon.
- After you enter text/photos in a notes section, a green notes ‘content tick’ appears to inform you that text/photos are present when notes are minimised.
- To close the notes section tap / click on ‘Notes’. Please note that you do not have to close the notes section, it is often easier to leave it open.
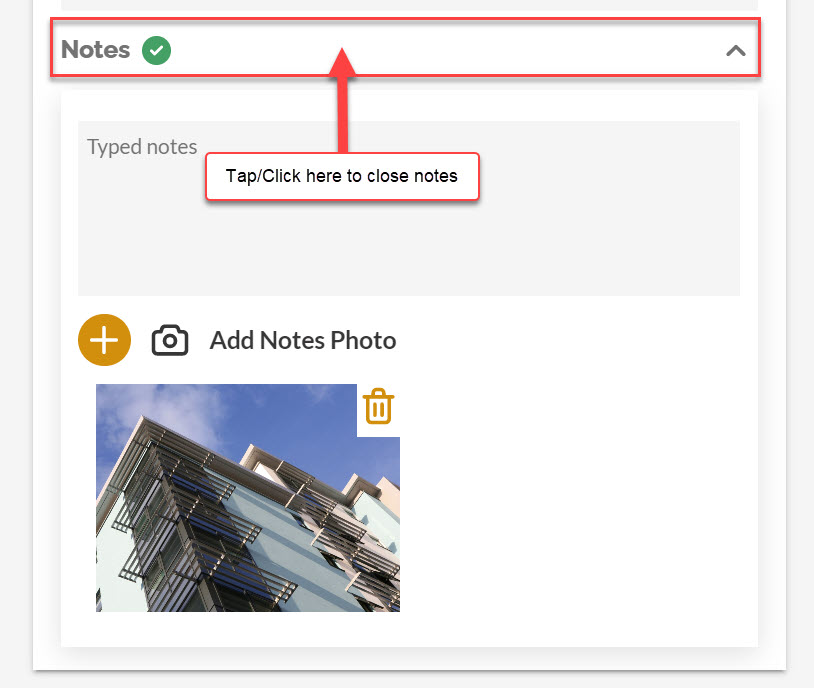
- As a result the notes section will close. The Notes ‘content tick’ will remain visible.
Useful Links #
Brightchecker Knowledgebase Index
About the Author #
Here’s the feedback option for this Knowledge Base article, how did we do?