Click on the topic you want to learn more about, alternatively scroll down the page.
Already Know How To Configure Sections? #
Already know how to use sections? The good news is that configuring items is pretty much identical to sections!
Add An Item #
From the ‘Manage Surveys / <Survey Name> and then item header screen, click on the box that says, ‘ Start typing its name’.
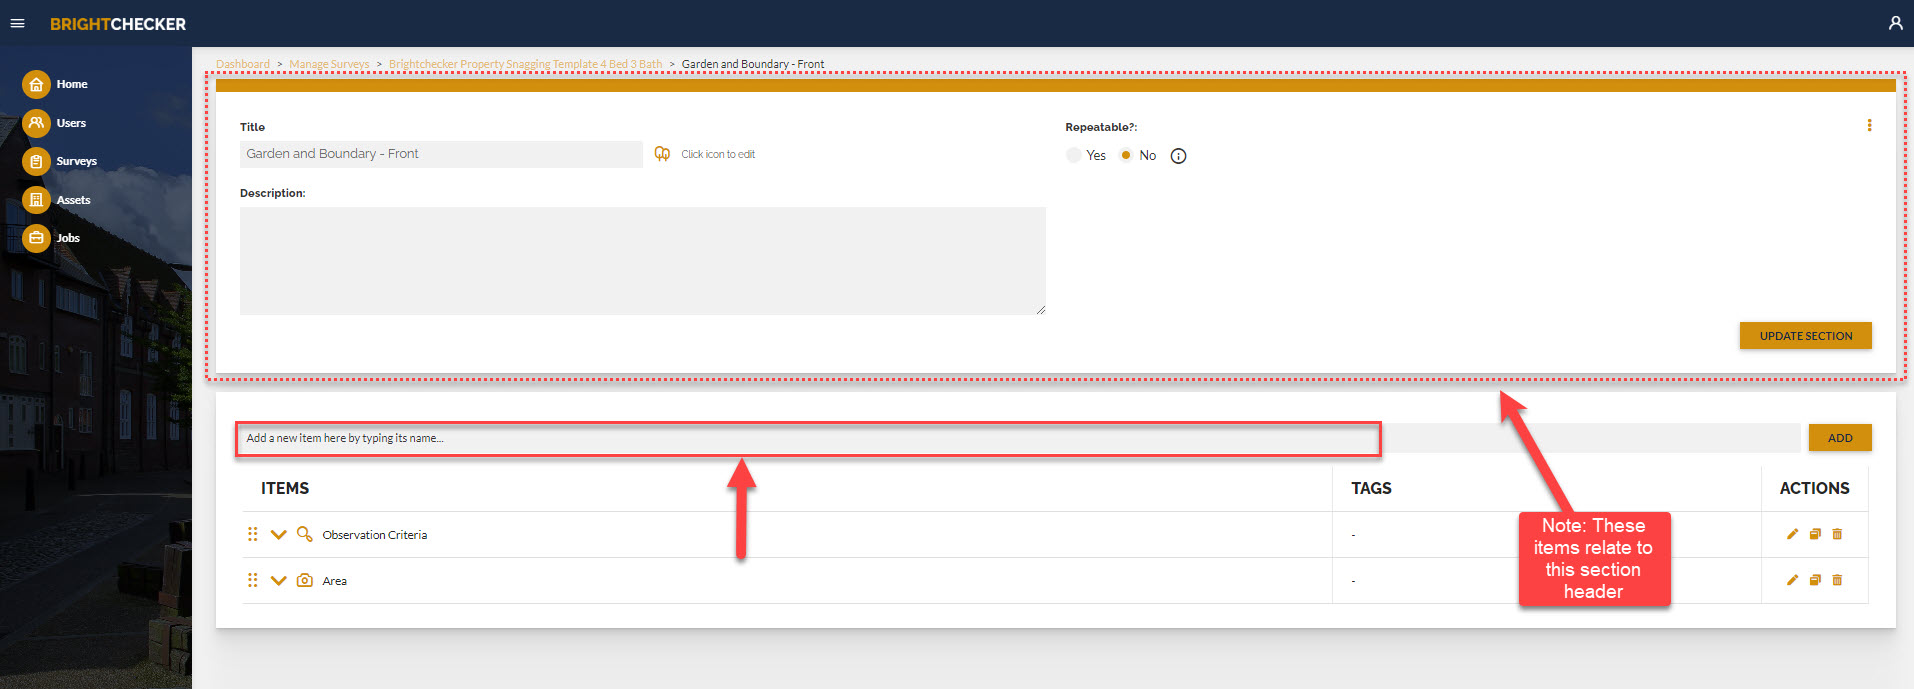
Type in a section name and on your keyboard click enter. Alternatively, click the add button to the right.
Note: Item names at the point of creation must include three characters. You can always edit the name down to one or two characters later if need be.
As a result, the item will be added to the bottom of the section list.
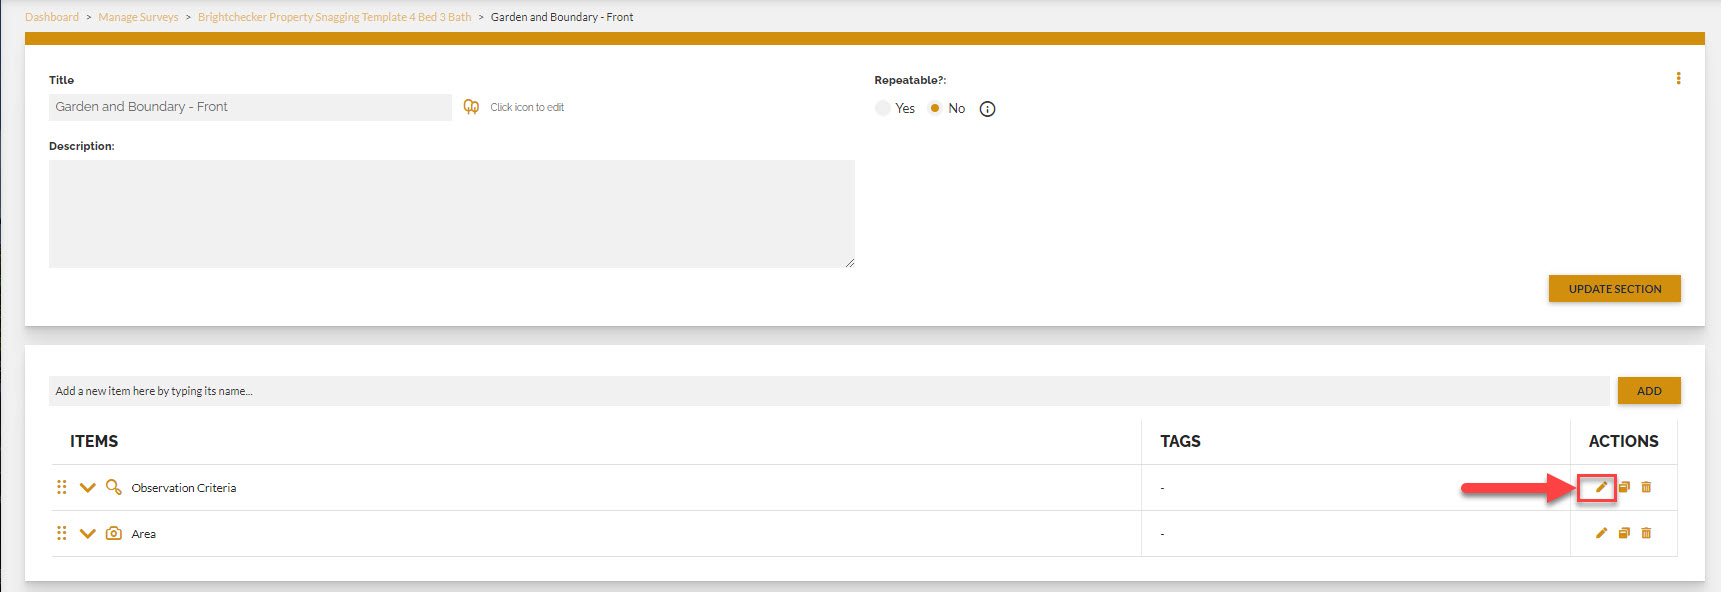
Edit An Item #
- Click on the pen icon to the right of the item name(or click on the item name itself). The item and any associated questions will be shown.
Changes -Remember to click ‘save item’ once you have made your change(s)
- Click on the item name to update/ edit the item name.
- Click on the description to update/edit the item description.
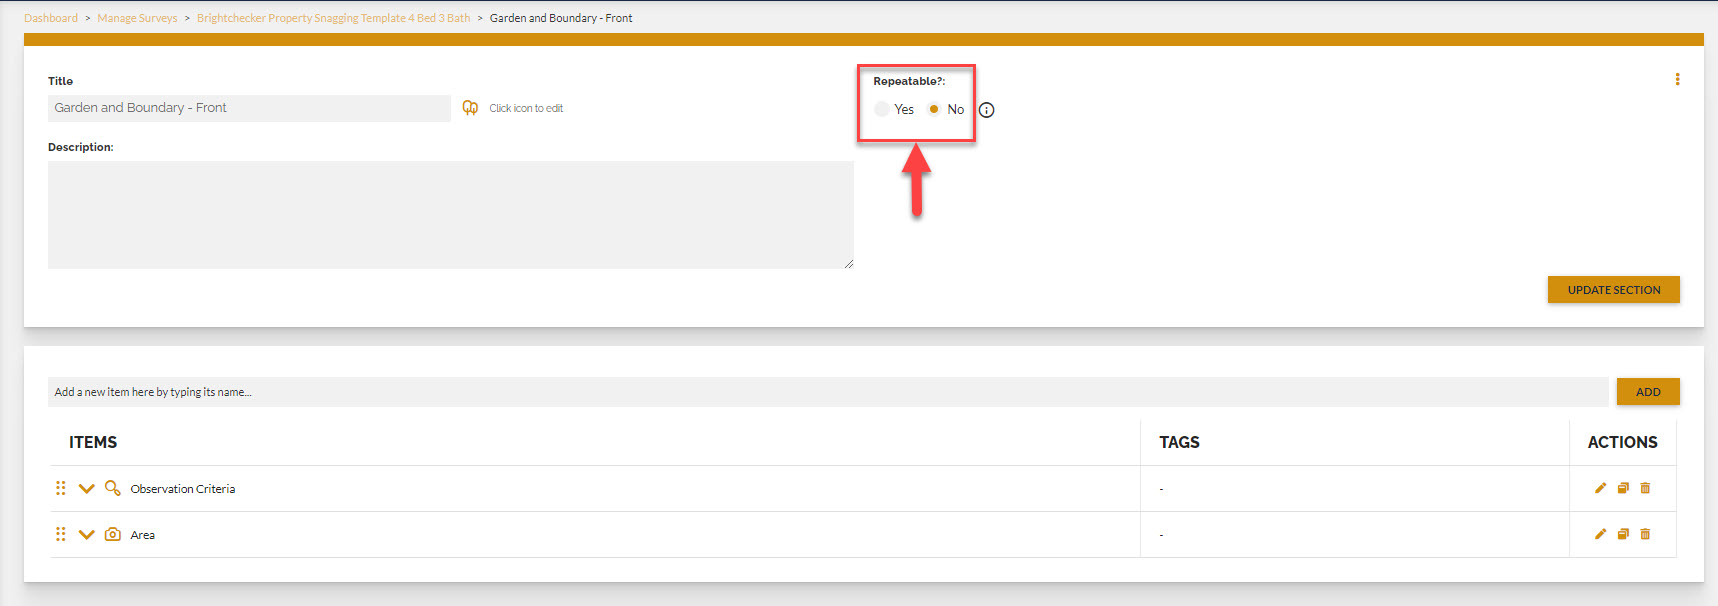
- Click a ‘Repeatable’? Yes or No circle. ‘Yes’ will enable a surveyor to duplicate this item and all its associated questions during a job. ‘No’ will stop a surveyor from duplicating this item and all its associated questions during a job.
- To Edit an item icon, click on the icon to the left of the ‘click on icon to edit’ wording.
![]()
- As a result, a new box will open with the message ‘Search for an icon’. Enter an icon name. Based on the name the system will present icon matches.
- You can find an icon using the knowledge base article ‘Icons ‘Icons By Category’.
- Click on an icon to select it, then click on ‘save changes’. is a question mark.
- Click ‘Close’ to exit.
Note: Where an item icon has not been defined, the app will display a ‘question mark icon’.
Duplicate An Item #
Click the ‘two overlapped objects’ icon next to an item.

The item is duplicated (with all its questions). The new duplicated item is called the same as the original item, but with a ‘copy of’ appended in front.
If you want to change the name of the new duplicated item, click the duplicated item’s name.
The appropriate item header appears.
Type the new item name in the title box, then click the orange ‘save item’ button to save your changes.
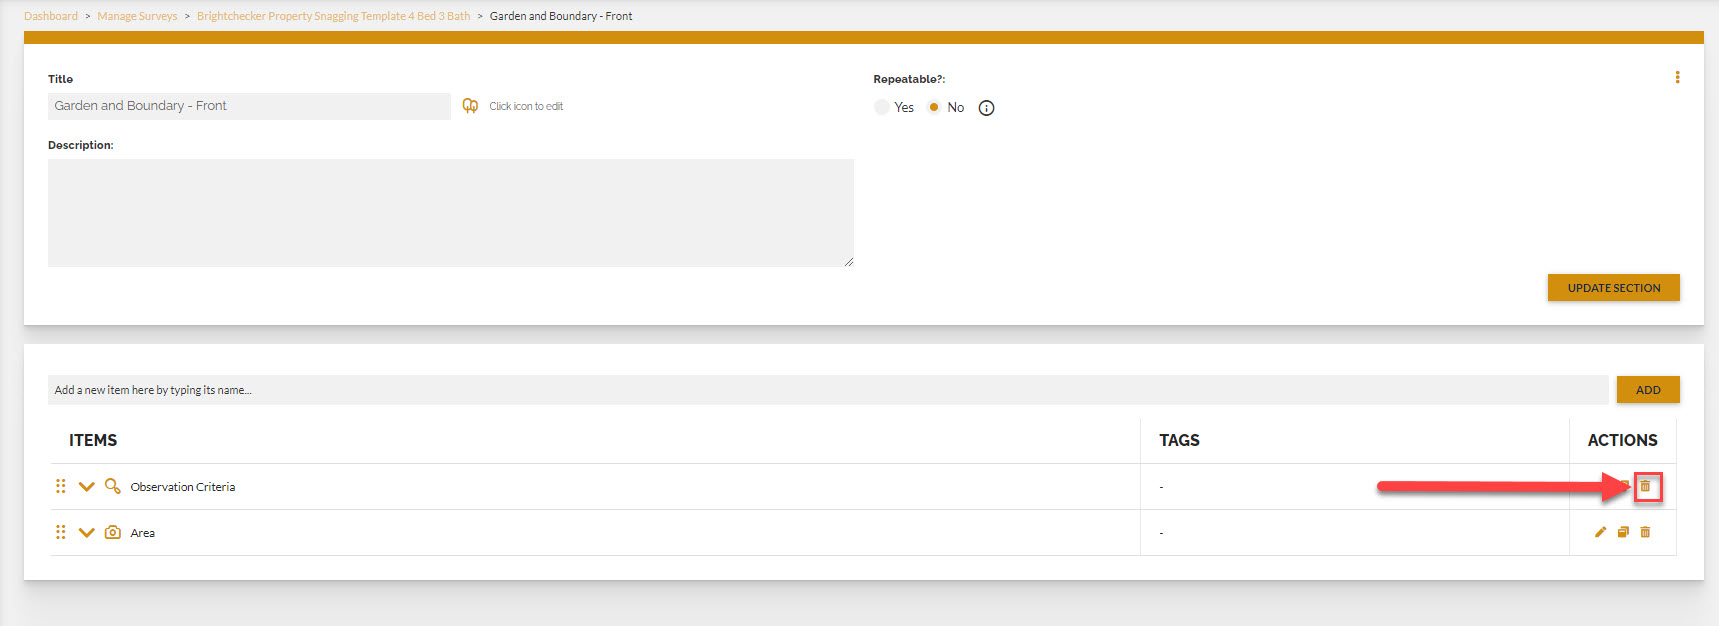
Delete An item #
Click the bin icon next to an item.
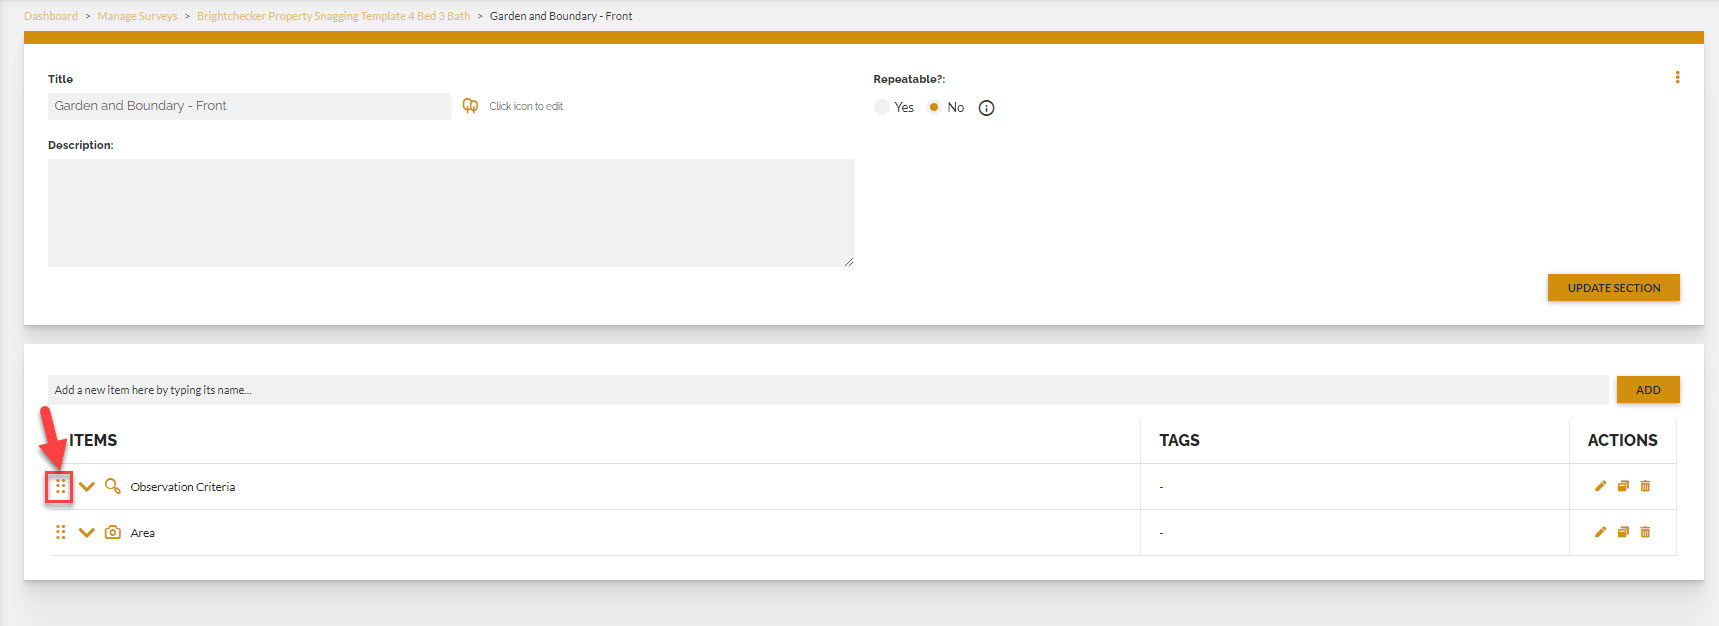
Reorder Items #
Click and drag the six dots to the left of an item and move the item to a new position in the item list.
Add / Delete Item Level Guidance Photograph #
To enable an item list to show the maximum number of items in one go, the add / delete Item level guidance photograph icon is only shown at item header/question level.
Instructions are therefore provided in that article.
Return To Survey’s Sections Page #
At the top of the webpage, click on the survey name that appears in the ‘breadcrumb’ navigation trail.
As a result you will be taken back to the survey’s sections page, where all sections of a survey are shown in a list).
‘Breadcrumb’ Example
In the screen shot below the breadcrumb trail is shown down to item level.
Dashboard>Manage Surveys>Brightchecker Snagging Template 4 Bed 3 Bath > Garden and Boundary -Front > Observation Criteria