Click on the topic you want to learn more about, alternatively scroll down the page.
Click/Tap #
As the app is a designed to be used with either a touchscreen device or a mouse/touchpad/keyboard system, Click/Tap is used in the instructions to indicate a user selection/action.
Job Screen #
The following information is displayed on the job screen
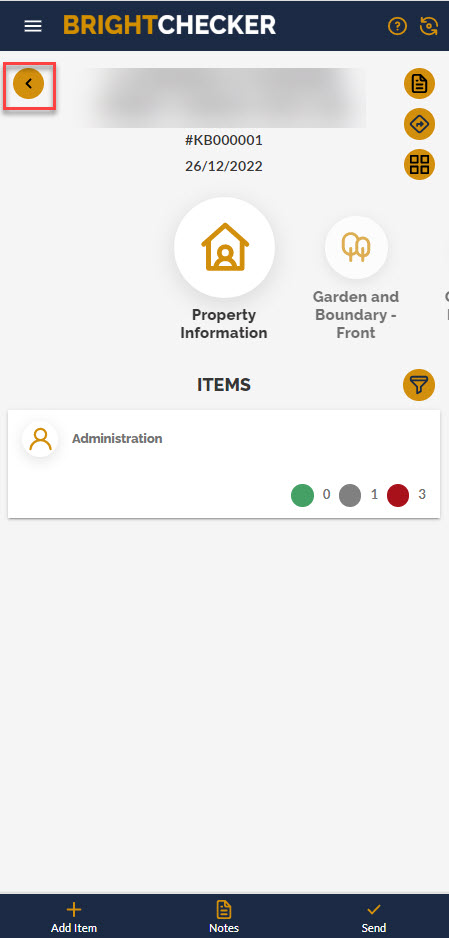
- The job address and proposed job date is displayed at the top of the screen.
- A survey section is centrally displayed under the address.
- Survey items, which relate to the centrally displayed section, appear underneath the centrally displayed section.
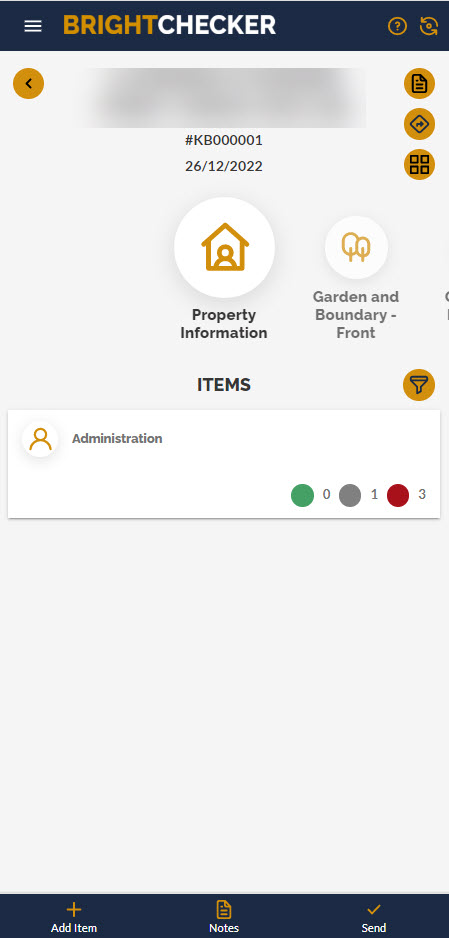
Section Level Progress #
Each section is surrounded by a circular progress bar. As the respondent answers required questions the progress bar moves clockwise and changes colour. If there are no required questions or all required questions have a response, then the circular progress bar is green and 100% complete.
Section Ticks #
Where all the items under a section have had all their questions answered (and consequently have a tick), then the section will have a tick.
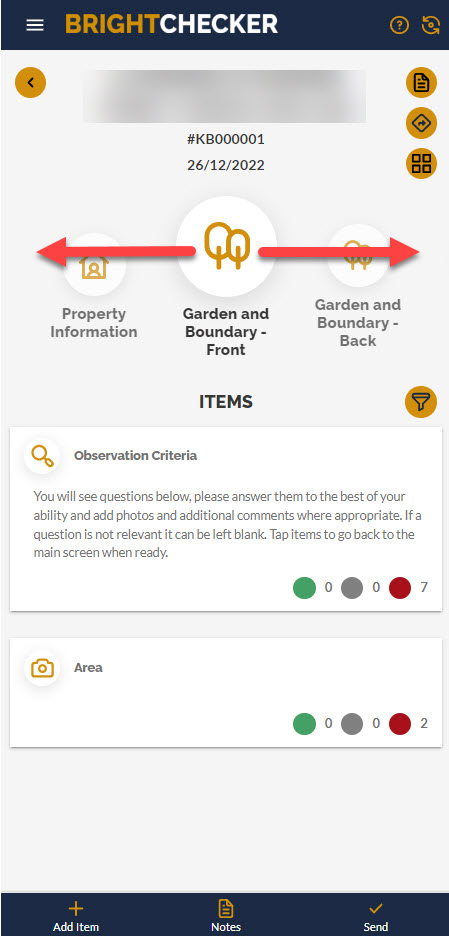
Moving/Swiping Between Survey Sections #
Swipe survey sections left or right to see other sections (where present). As the sections move the items associated with each new ‘central’ section will be shown underneath that section.
Asset Property Notes #
Where you can read / write surveyor job notes. These will be visible to the job reviewer in the dashboard but will not be included in the final report.
- Tap/Click the document button, then the ‘your notes’ tab to write surveyor comments on the job.
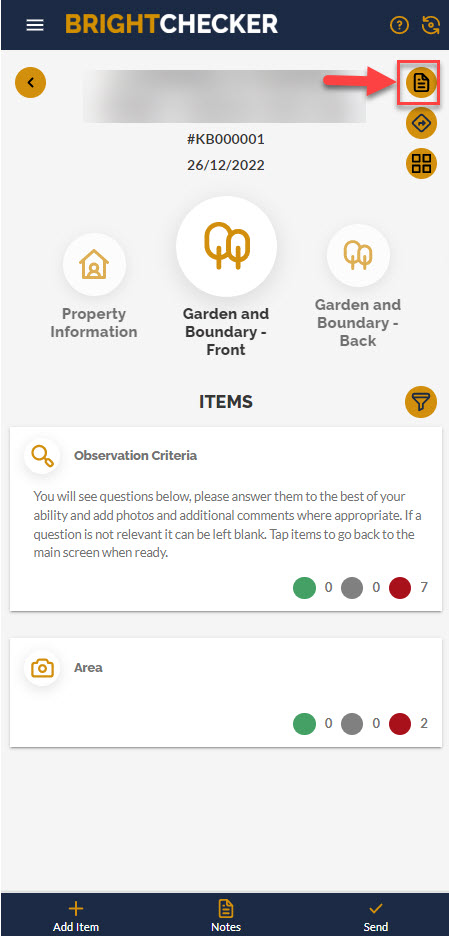
- You can also use the notes button on the footer
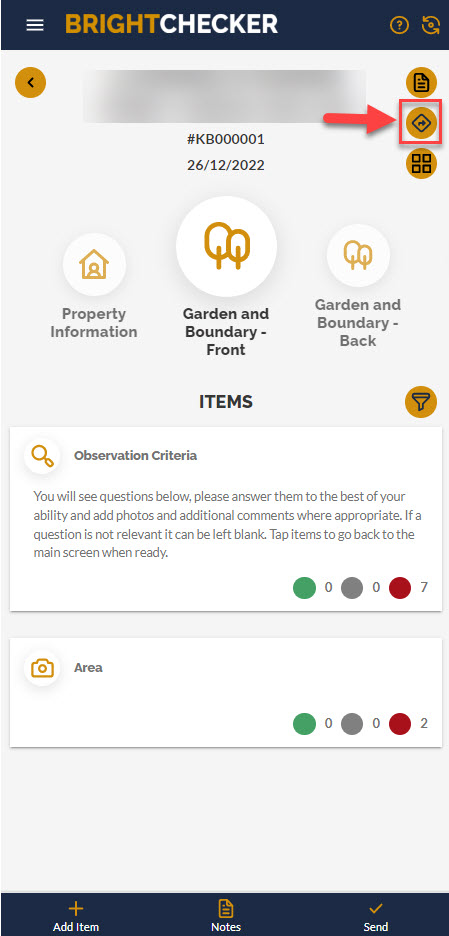
Google Map Job Location #
- Tap/Click the arrow button to see the job address on google maps.
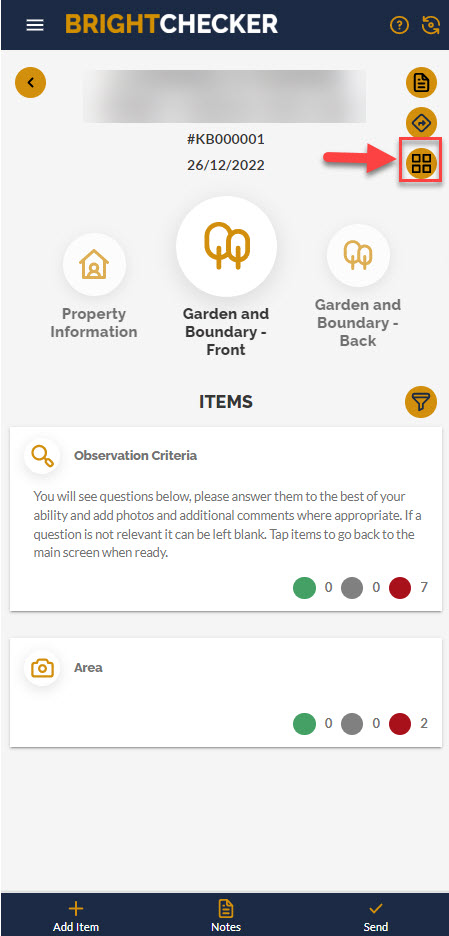
Review Every Survey Section At Once #
- Tap/Click ‘grid’ icon to go to the Sections ‘Grid’ View / Add Section Screen.
- Swipe up and down to see all job sections in the ‘Grid’ view
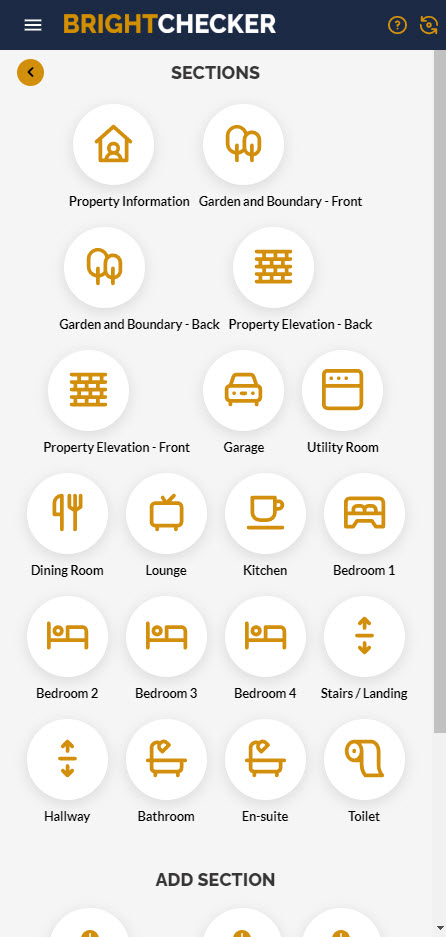
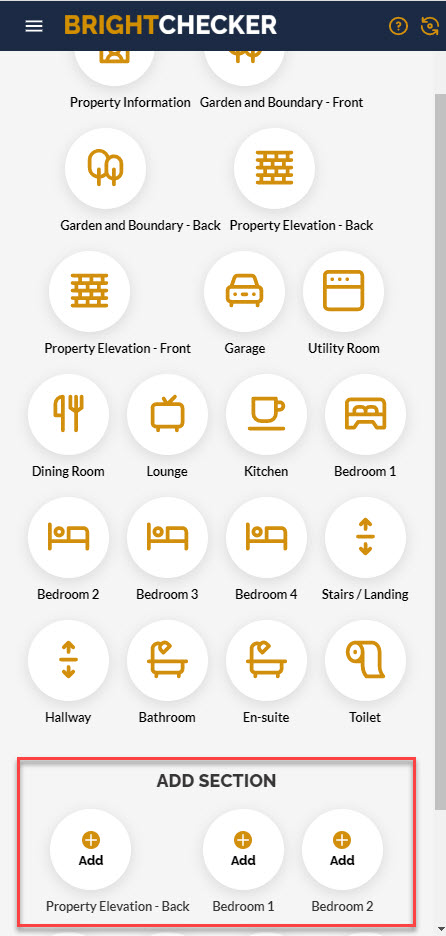
Add A Section #
- From the Grid View, Tap/Click on a section underneath ‘Add A Section’
Note: Only sections that are allowed to be duplicated (by the survey template) will appear.
 #
#
- Select a Section to duplicate by Click ‘+Add.’ Accept the original section name or amend as appropriate N.B. You will not be able to change its name at a later point.
- Tap/Click ‘Save’ to add the new section. Click ‘X’ to stop adding a section.
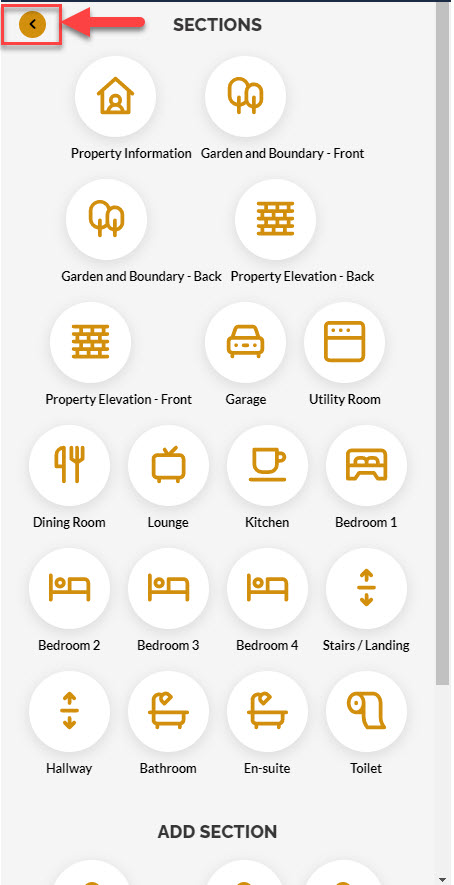
Return to the Job Survey Screen
From the Grid View, Tap/Click the ‘<‘ arrow
Return To The My Jobs Screen #
- From the Job Survey Screen, Tap/Click the back arrow.
Useful Links #
Brightchecker Knowledgebase Index
About the Author #
Here’s the feedback option for this Knowledge Base article, how did we do?