Click on the topic you want to learn more about, alternatively scroll down the page.
Add A Question #
From the ‘Manage Surveys / <Survey Name>, then section header screen, then items list for that section, click the ‘start typing a question name’ box and enter a survey question.
N.B. a question name must contain three or more characters.
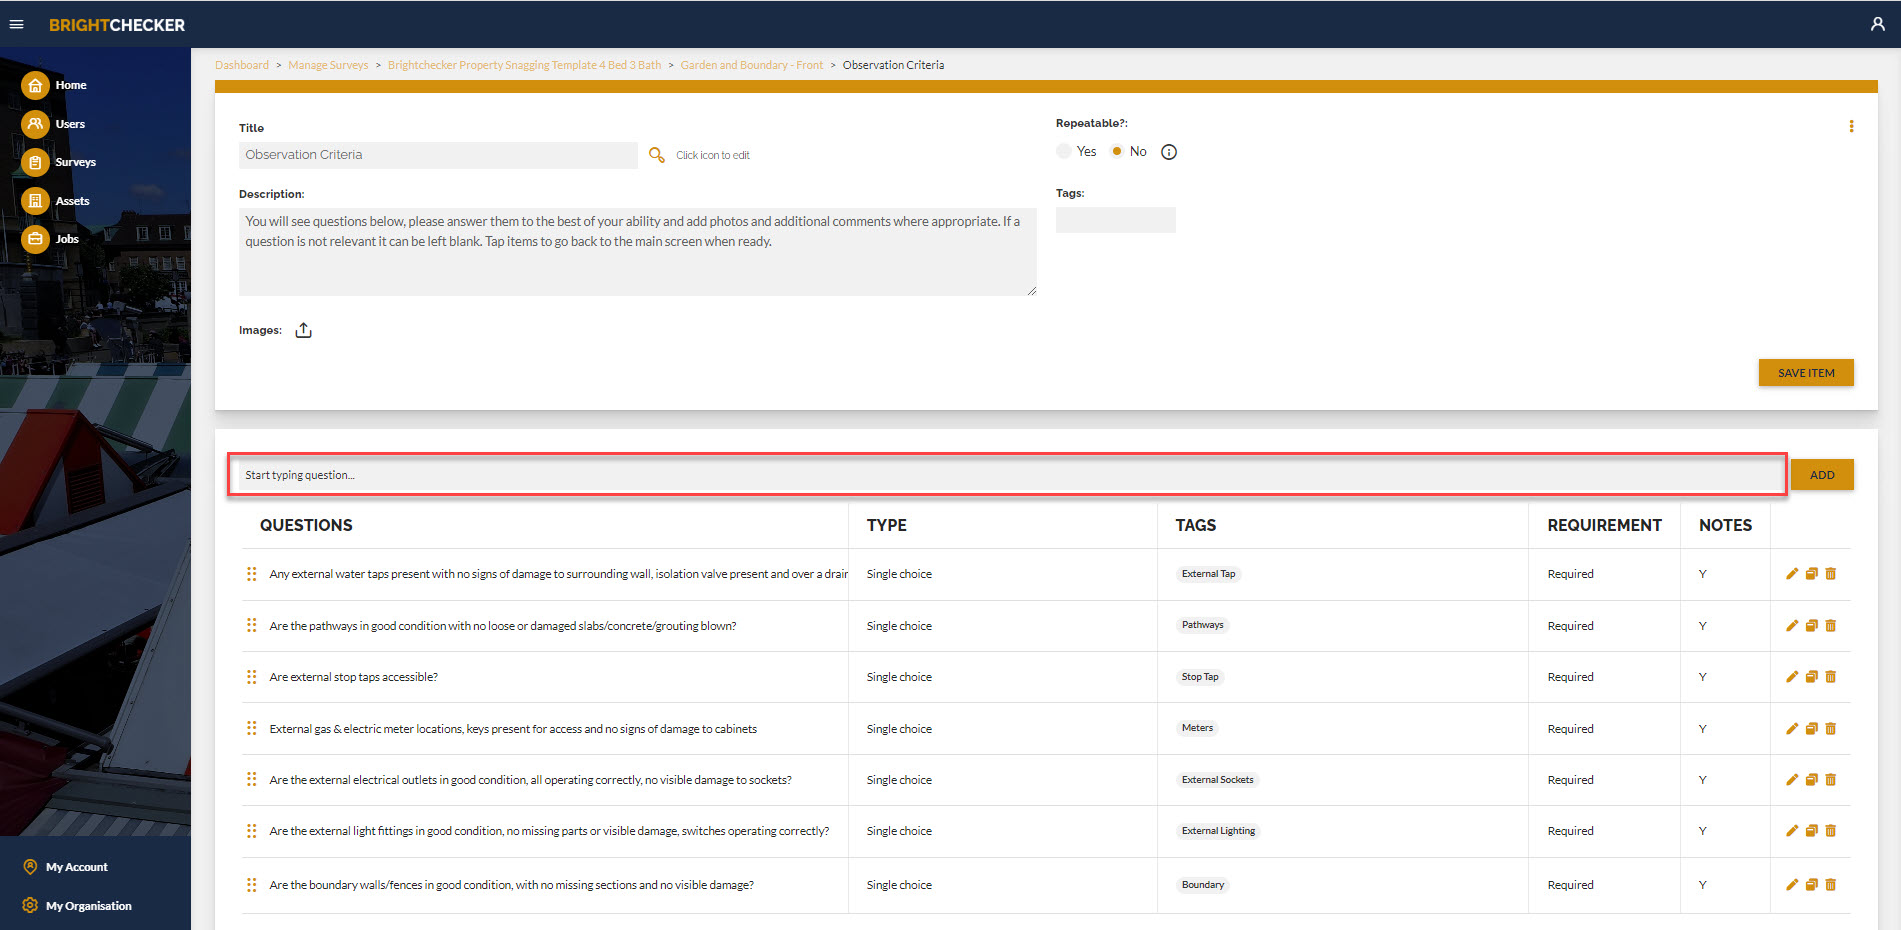
Click enter on your keyboard or click the ‘Add’ Button.
As a result, the question sidebar appears.
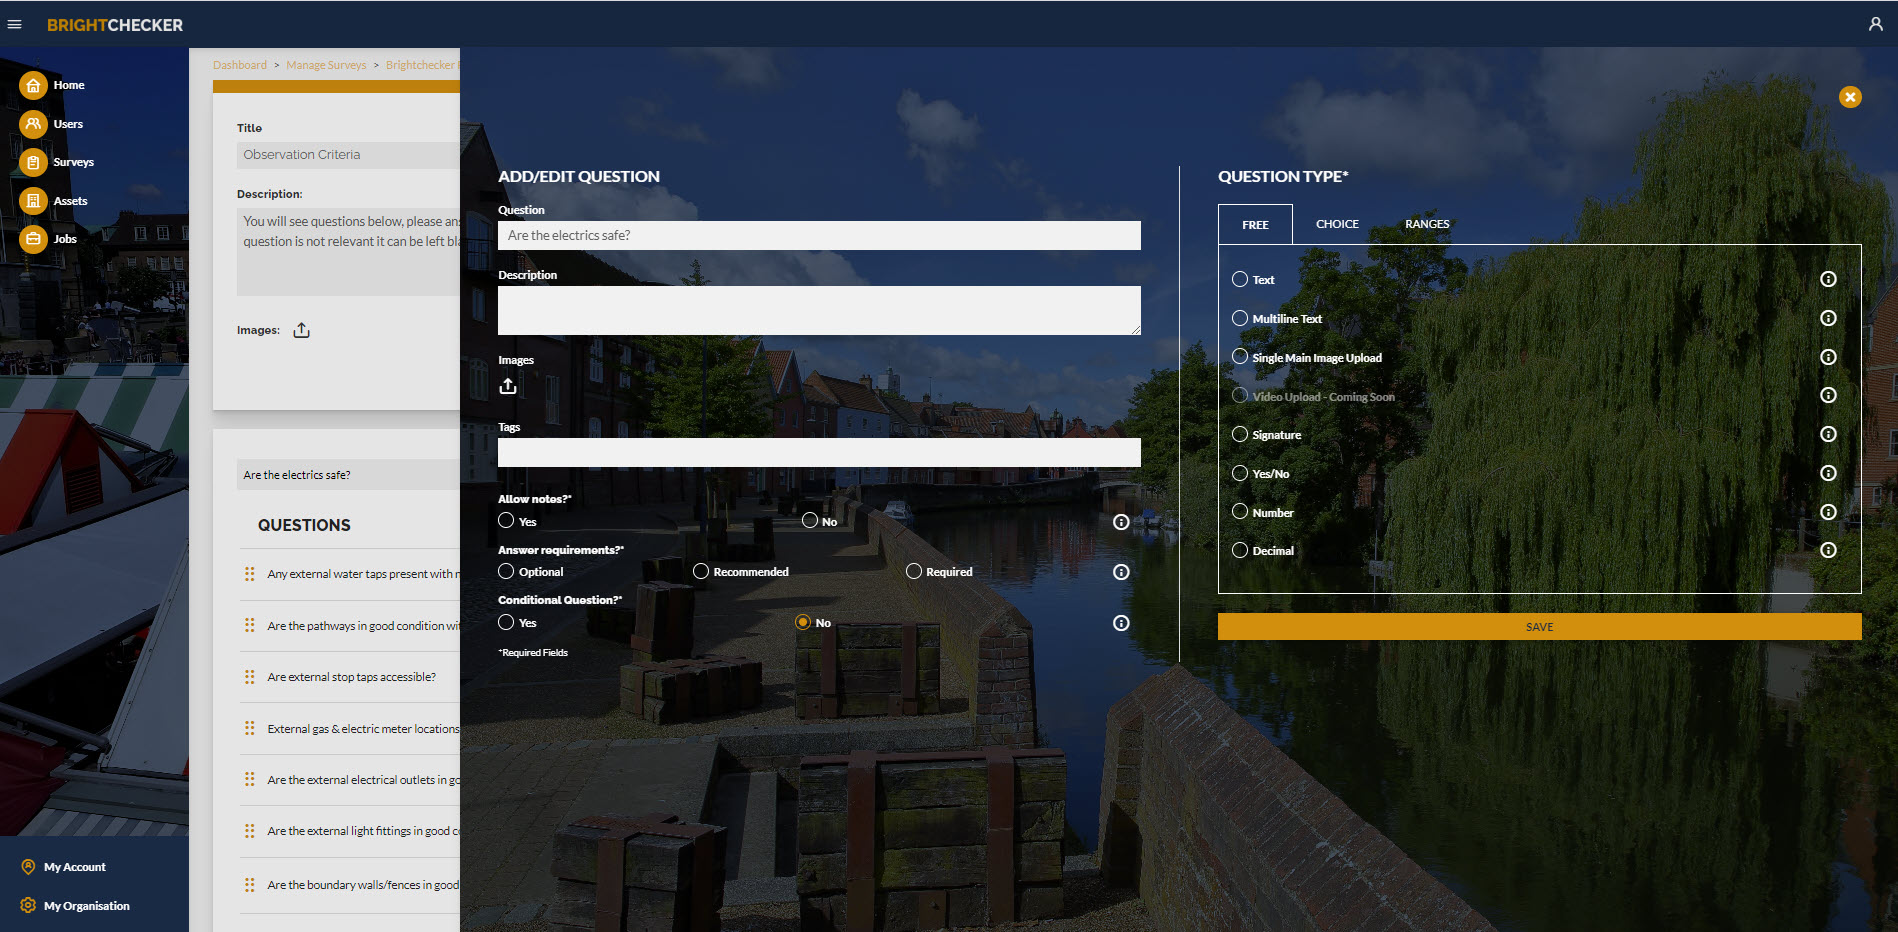
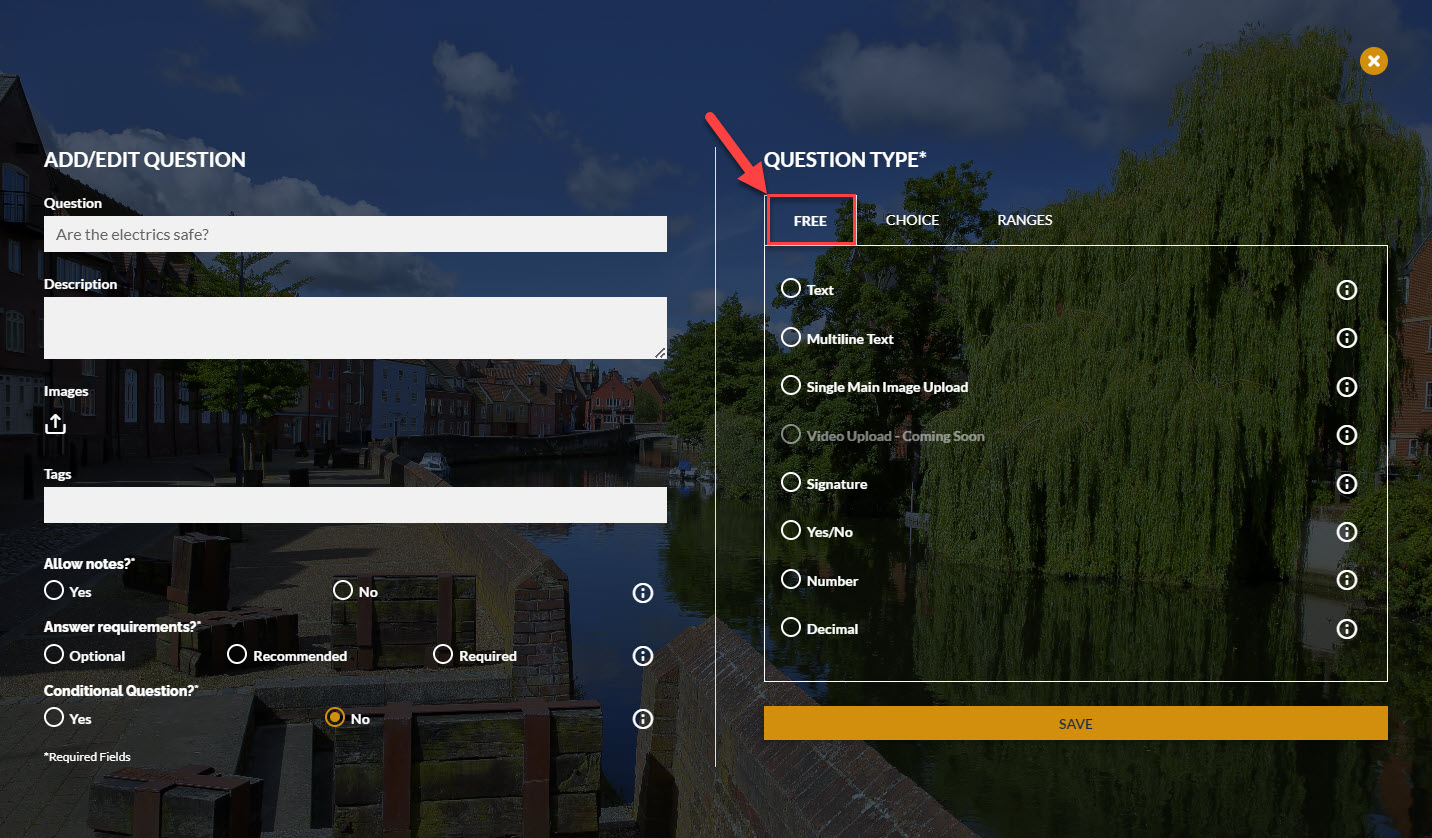
The add/edit question sidebar is effectively split into 2 halves.
The left half contains the mandatory question fields which remain the same no matter what the question type is.
The right hand side changes depending upon the question type (see below for more details).
Underneath the heading ‘ADD/EDIT QUESTION’:
- Question – click on the white box under ‘Question’ to edit the question text.
- Description – click on the white box under ‘Description’ to optionally enter text to put the question in some context and/or provide additional guidance.
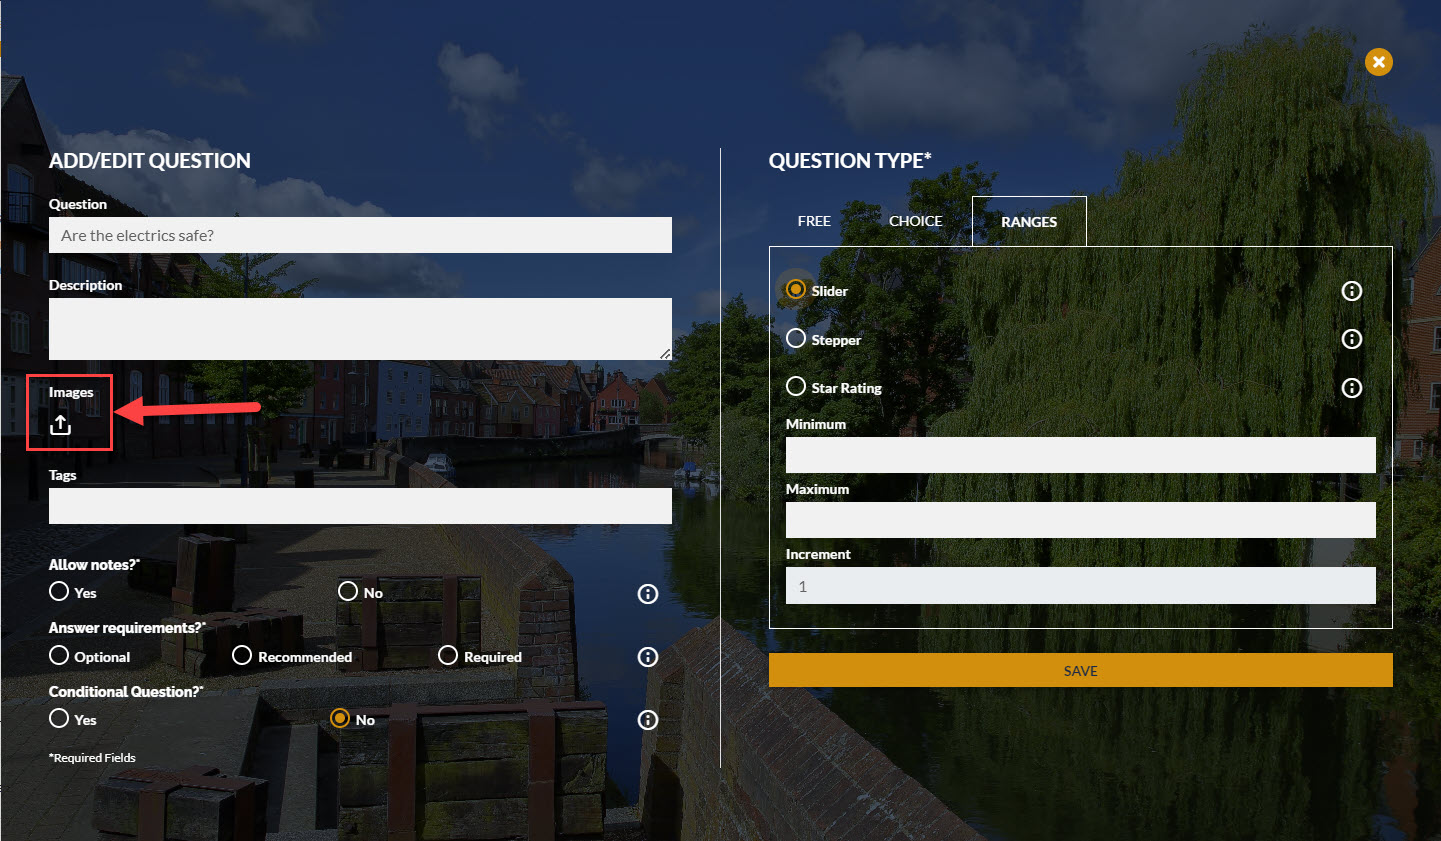
- Images – click on the up arrow to optionally include one or more JPEG images to put the question in some context and/or provide additional guidance. Each JPEG image cannot be bigger than 0.5MB. Click the bin icon to remove question guidance photograph(s).
- Tags – click on the white box under ‘Tags’ to optionally enter one or more short descriptive terms that will appear with the question.
- Notes allowed – Clicking ‘yes’ means that the question response can be augmented with text and one or more photos. Clicking ‘no’ means that the question response cannot be augmented. A choice must be entered, otherwise, the question cannot be saved.

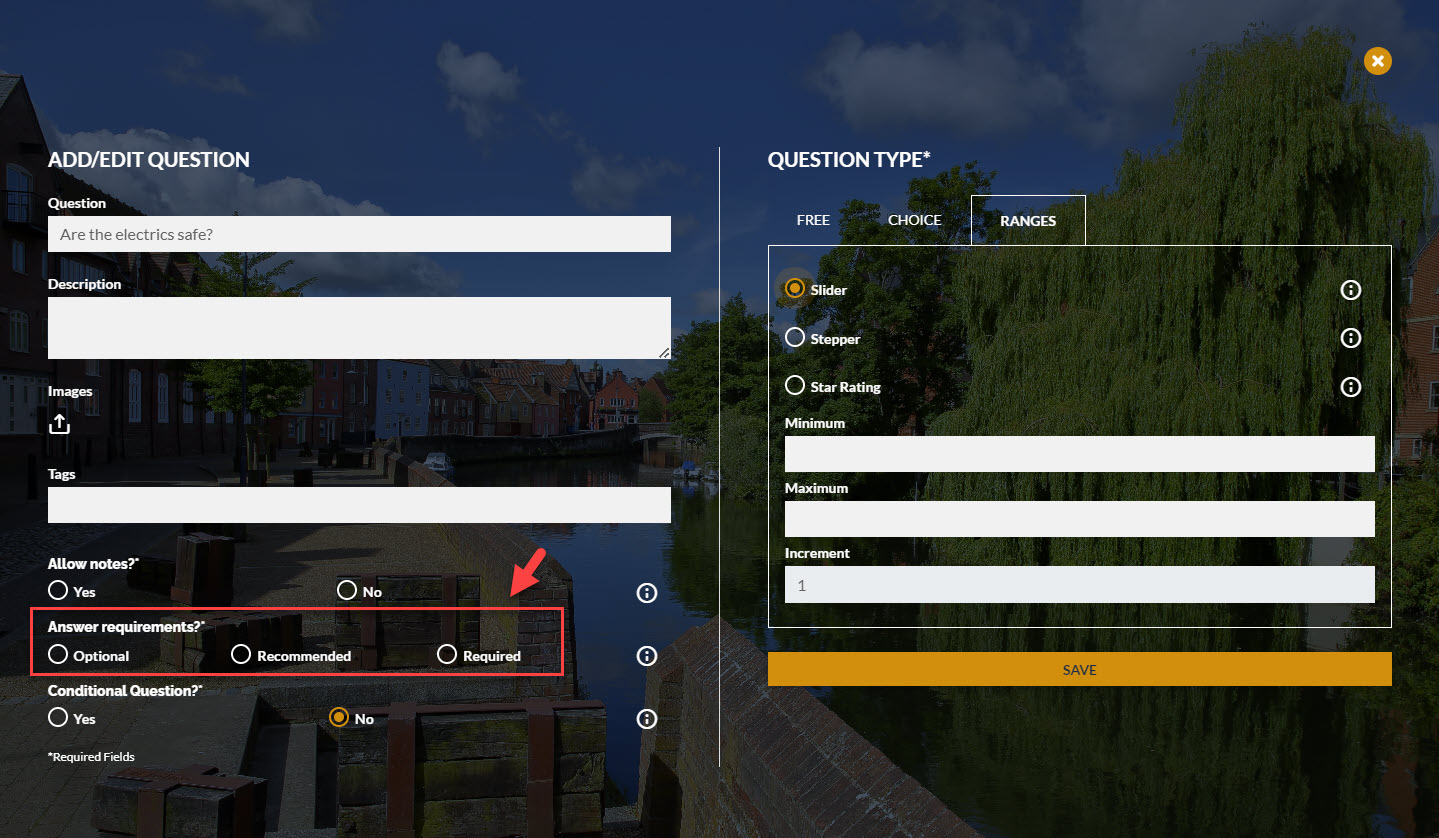
- Answer Requirements – A question can be set as ‘Optional,’ ‘Recommended’ or ‘Required.’ A choice must be entered, the question cannot be saved without a choice. Recommended questions will be flagged as such in the App. Required questions will be flagged as such in the App. N.B. A job can still be submitted by the App with required questions that have no responses.
Question Types
Underneath the heading ‘Question Type’ there are three words. Each relates to one of three high-level question styles (Free, Choice & Ranges).
The one currently selected is surrounded by a white lined box.
The ‘Free’ question style is initially shown by default when adding a question.
To reveal ‘Free’ style questions when the ‘Choice’ or ‘Ranges’ style is selected, click the word ‘Free’.
Select one of the following. Remember to click ‘Save’ once you have finished configuring the question.
- Click the empty white circle next to ‘Text’. The circle filling turns orange. The respondent will be able to capture a free text response in a single-line box. It is ideal for short responses.
- Click the empty white circle next to ‘Multiline Text’. The circle filling turns orange. The respondent can capture a free text response. The multi-line text box is ideal for longer responses.
- Click the empty white circle next to ‘Single Main Image Upload’. The empty white circle turns orange. The respondent can (1) take a photo with a mobile device (2) browse device folders for a photo (3) select a photo from a mobile device photo gallery.
- Coming Soon – Video Upload.
- Click the empty white circle next to ‘signature’. The empty white circle turns orange. The respondent can capture a signature.
- Click the empty white circle next to ‘Yes/No’. The empty white circle turns orange. The respondent can interact with a simple no / yes toggle. Please note that only ‘yes’ is considered a response if a question is set to ‘Required.’
- Click the empty white circle next to ‘Integer’. The empty white circle turns orange. The respondent can capture an integer.
- Click the empty white circle next to ‘Decimal’. The empty white circle turns orange. The respondent can capture a number, decimal point, and decimal fraction.
Choice Style Questions #
To reveal ‘Choice’ style questions when the ‘Free’ or ‘Ranges’ style is selected, click the word ‘Choice’.
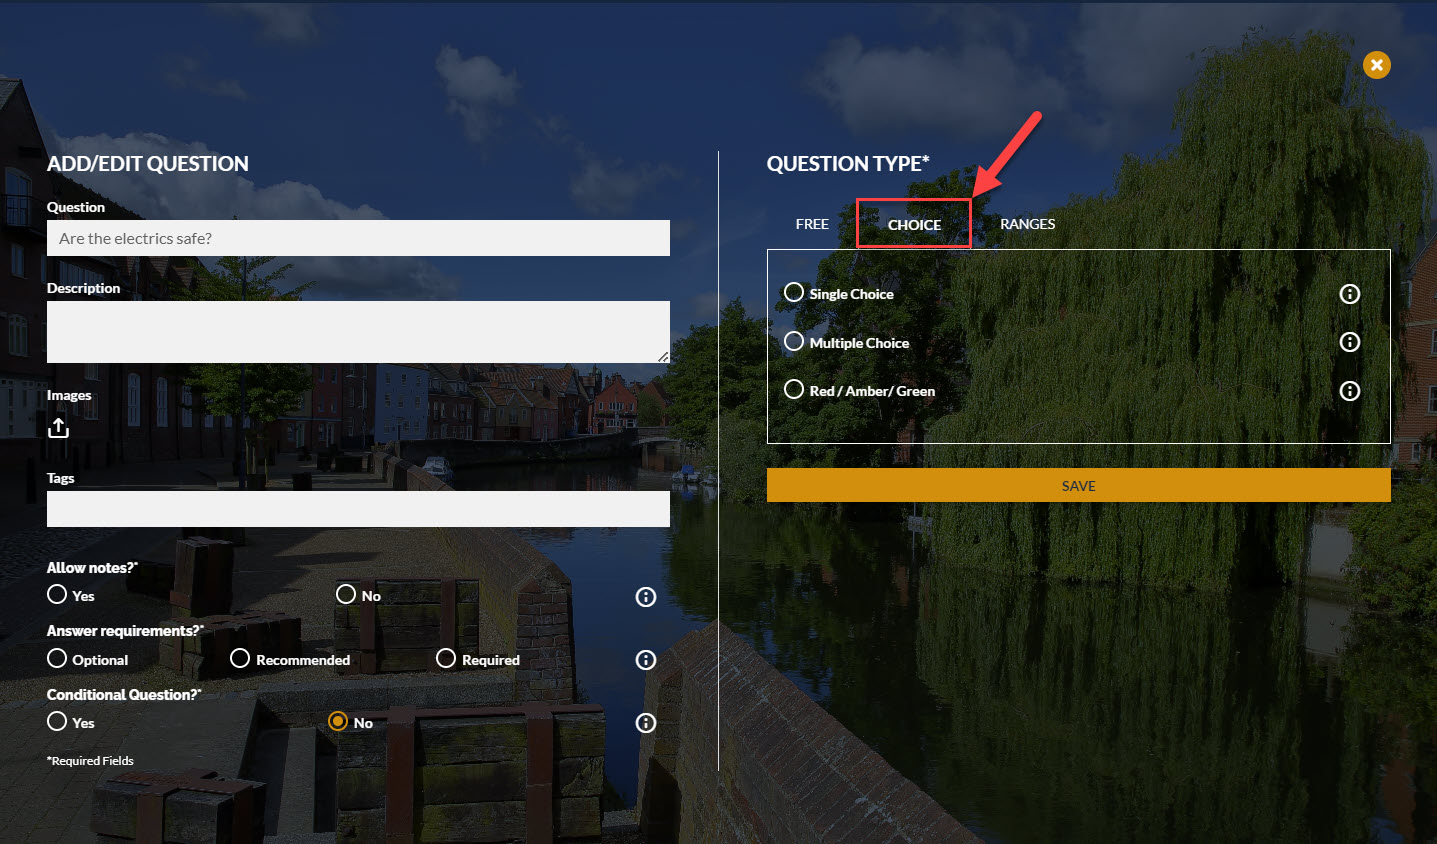
Select one of the following. Remember to click ‘Save’ once you have finished configuring the question.
- Click the empty white circle next to ‘Single Choice’. The empty white circle turns orange. An options box will appear. Click on the options box and type the text of the first option then enter.
- The option appears on the screen. Repeat as many types as necessary. To delete an option, click on the x next to it. N.B. There is no click and drag on choices. Once completed a respondent will be able select a single response from a set of answers.
- Click the empty white circle next to ‘Multiple Choice’. The empty white circle turns orange. An options box will appear. Click on the options box and type the text of the first option then enter. The option appears on the screen. Repeat as many types as necessary. To delete an option, click on the x next to it. N.B. There is no click and drag on choices. Once completed a respondent will be able select one or more responses from a set of answers.
- Click on the white circle next to ‘Red/Amber / Green’. The empty white circle turns orange. The respondent can select a ‘red,’ ‘amber’ or ‘green’ answer response. If you need a response other than red, amber, or green consider using a ‘Single Choice’ question.
Range Based Questions #
To reveal ‘Ranges’ style questions when the ‘Free’ or ‘Choice’ style is selected, click the word ‘Ranges’.
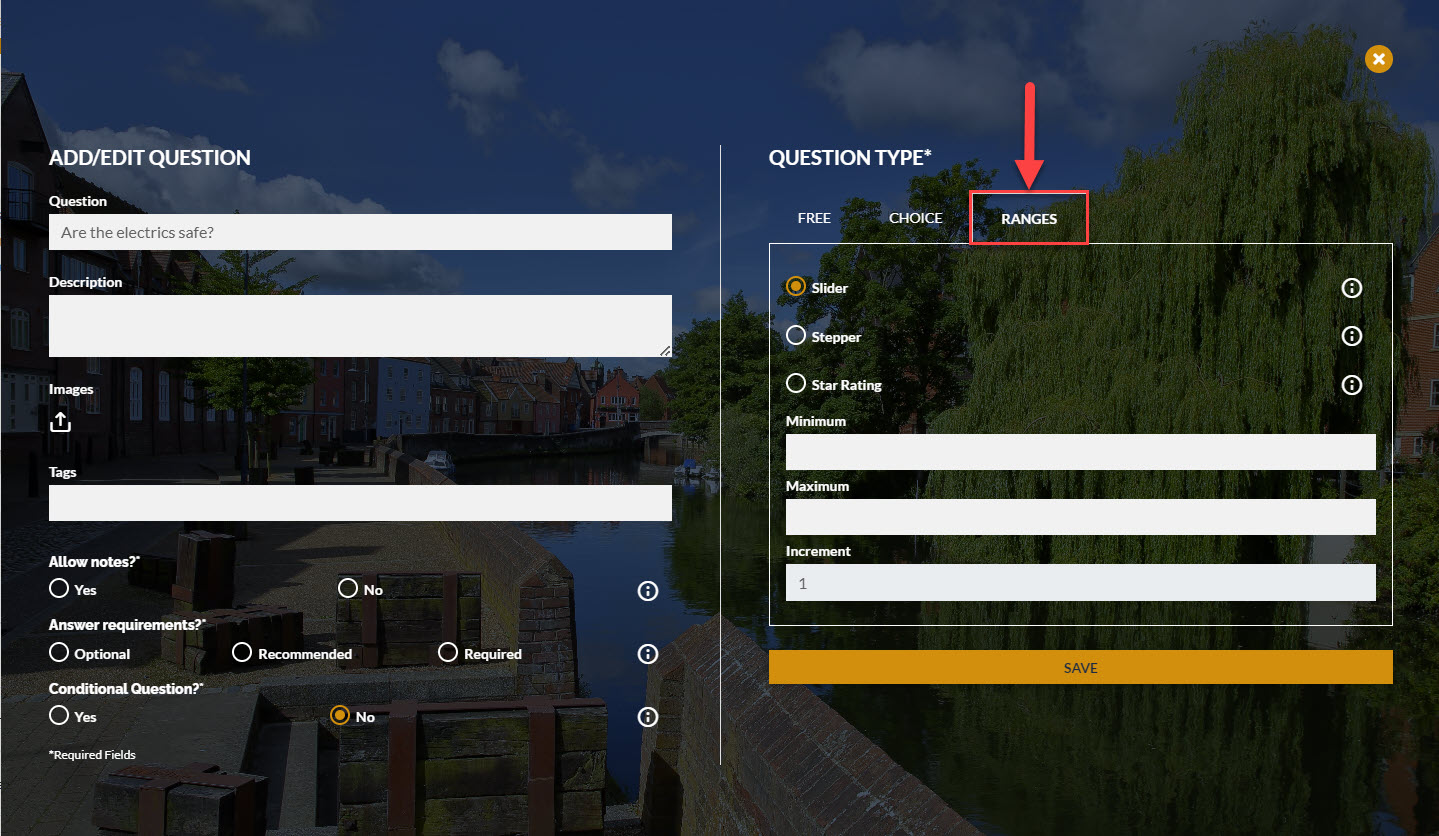
A ranges question is used when an individual needs to provide an answer within a proscribed range of a minimum, a maximum and by using set increments.
All range questions have minimum, maximum and Increment fields. Remember to click ‘Save’ once you have finished configuring the question.
Range questions include:
- The respondent can drag a sliding ball across a scale and as they do so a value will appear. Value increments are always set at 1. The value minimum and maximum must be defined during question creation.
- The respondent can drag a ball across a graduated scale and as they do so a value will appear. The minimum, maximum and increment values must be defined during question creation.
- Star Rating. The respondent can make a response via a star scale. Value increments are always set at 1. The minimum and maximum values must be defined during question creation.
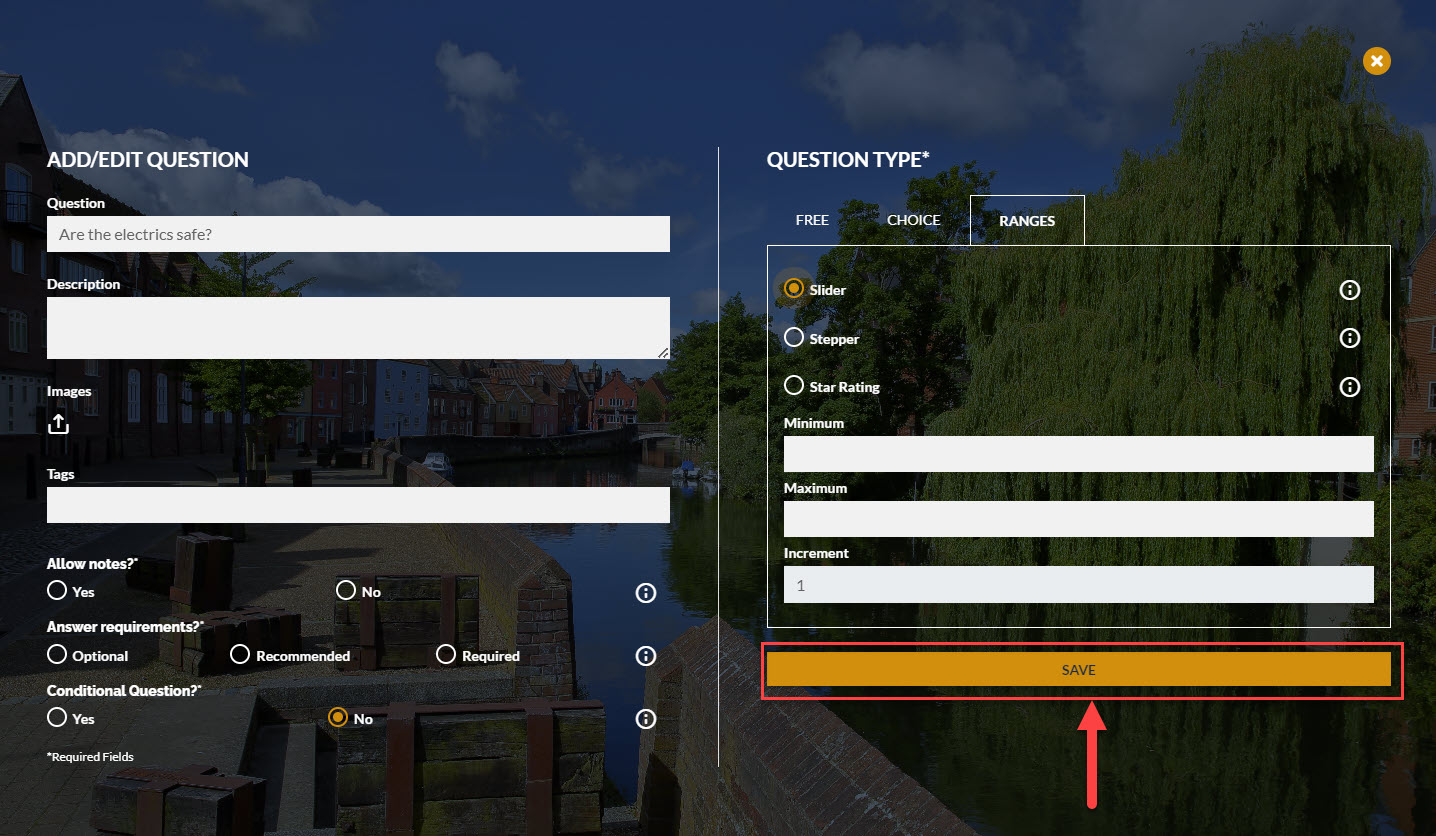
To Save A Question #
To save a question click ‘Save’.
How To Edit A Question #
From the item and question list, click on the pen icon to the right of a question.
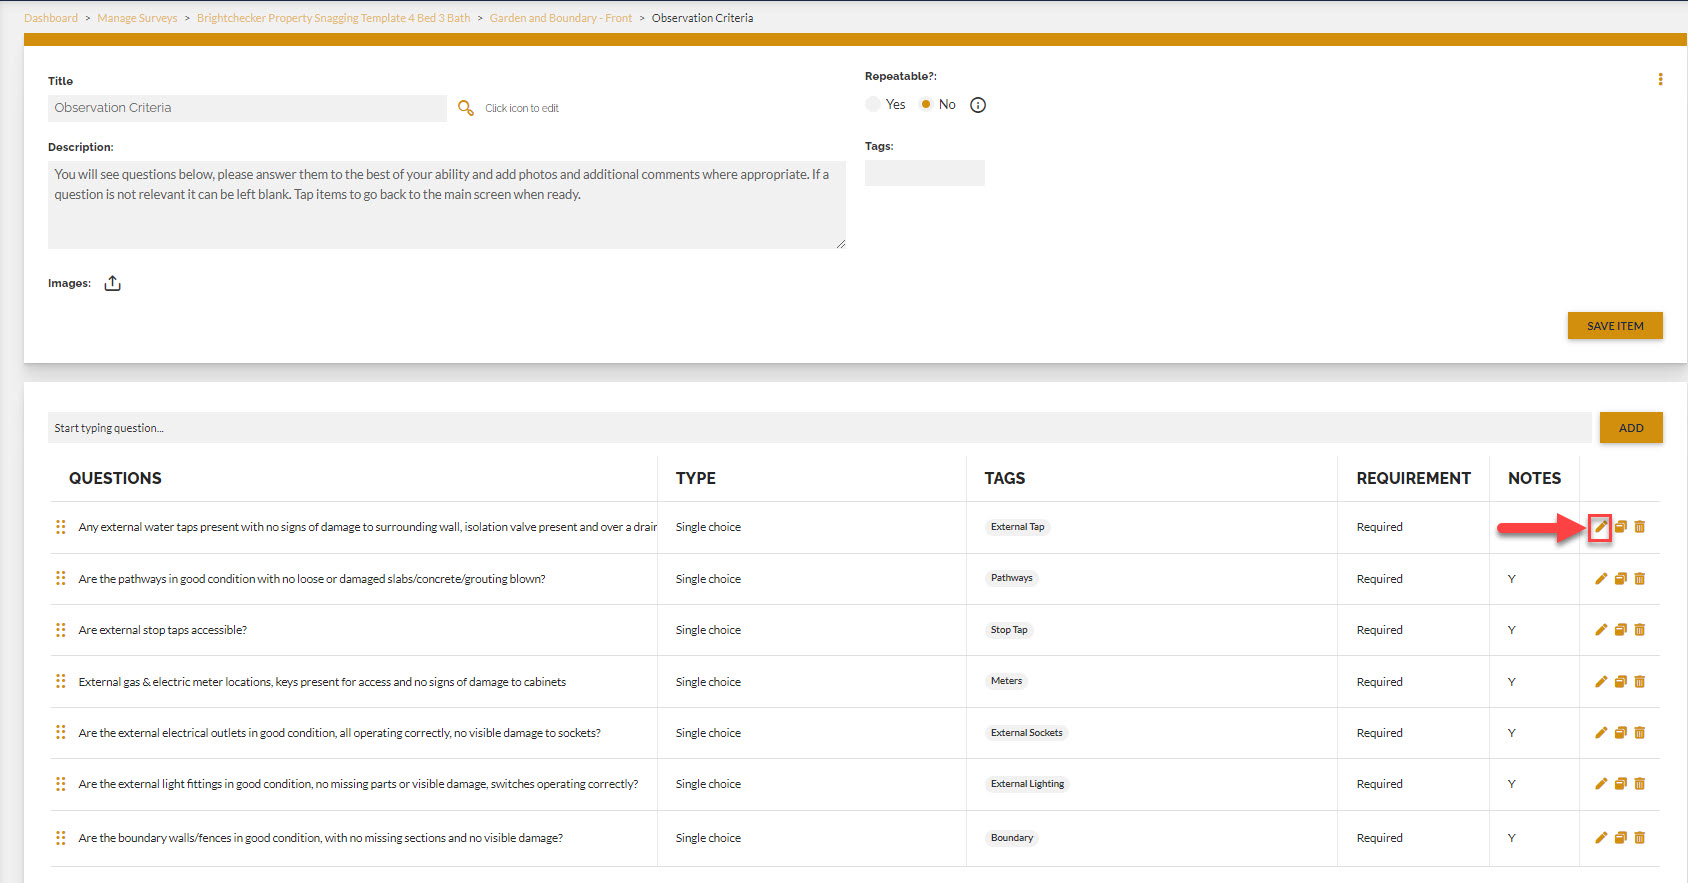
As a result the question sidebar will appear. Follow the ‘How to create a question’ guidance above to edit the question.
Click ‘Save’ once you have finished modifying the question.
How To Duplicate A Question #
From the item header and question list, click the ‘two overlapped objects’ icon next to a question.

The question is duplicated. The new duplicated question is called the same as the original question, but with a ‘copy of’ appended in front.
To amend the duplicated question, follow ‘Edit A Question’ instructions above.
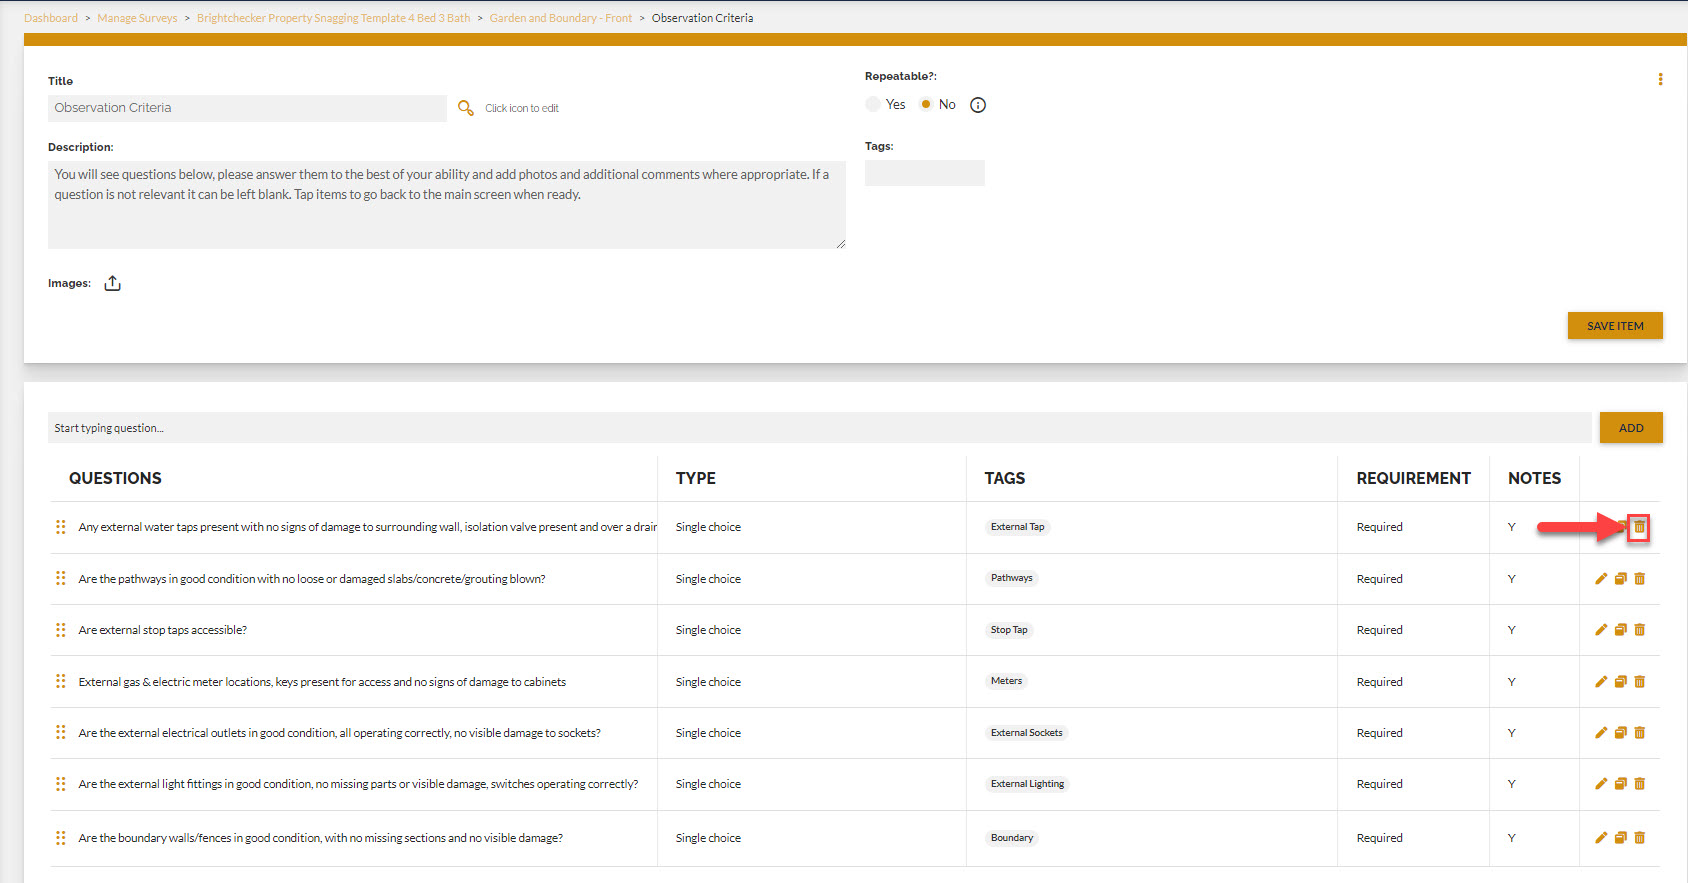
How To Delete Questions #
From the item header and question list, click the bin icon to the right of a question.
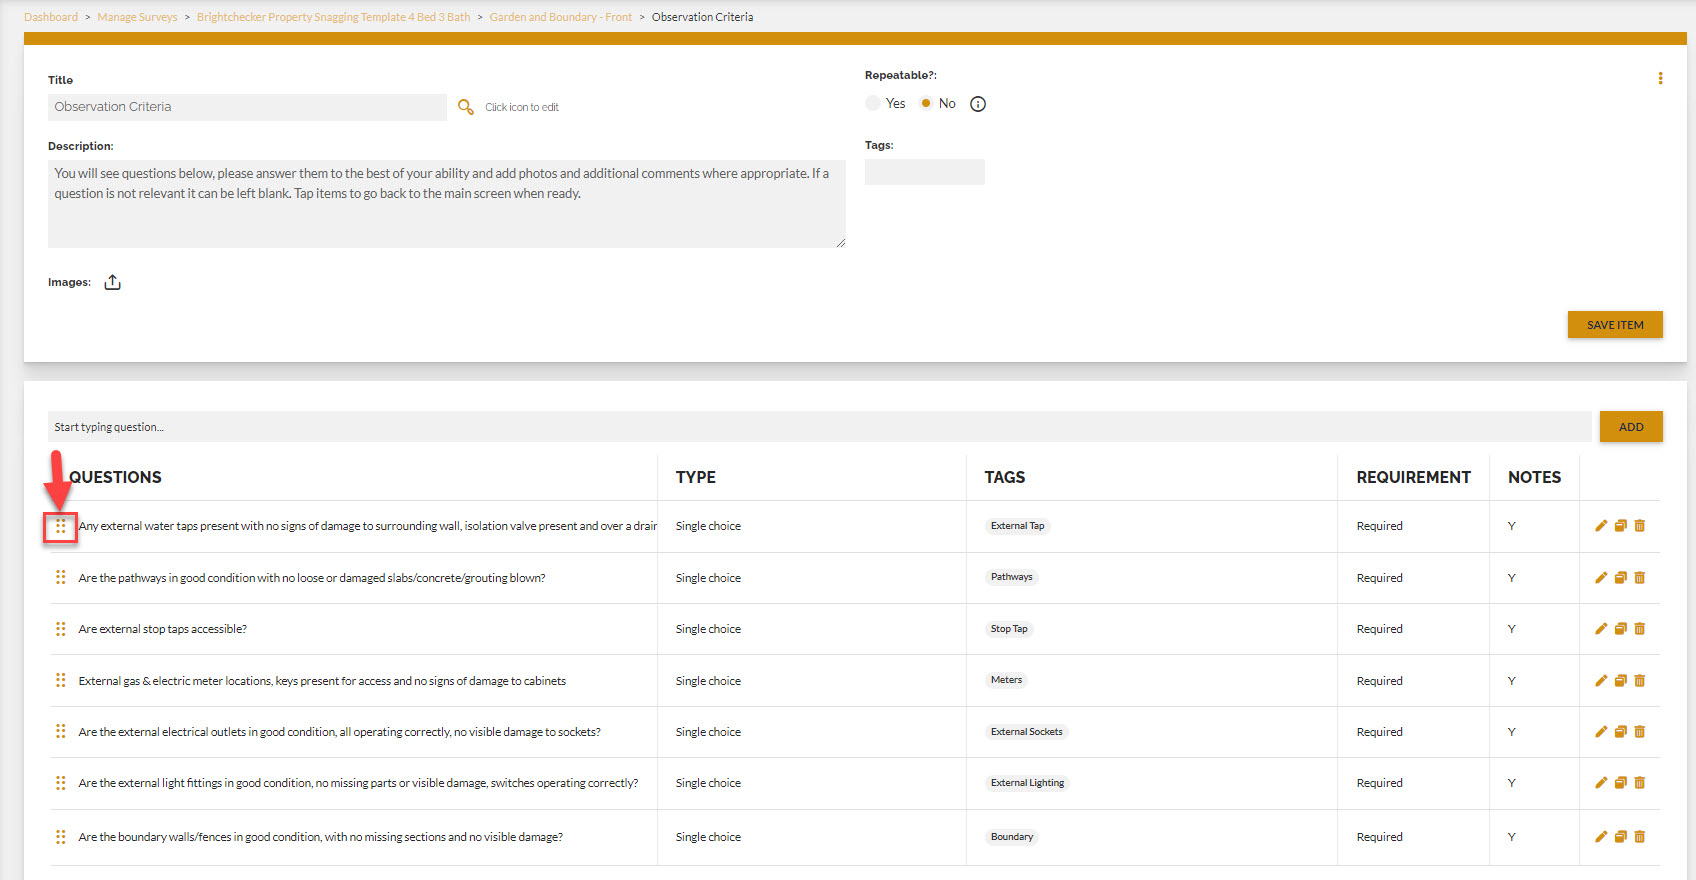
How To Reorder Questions #
From the item header and question list, click and drag the six dots to the left of a question and move the question up or down into a new position in the question list.
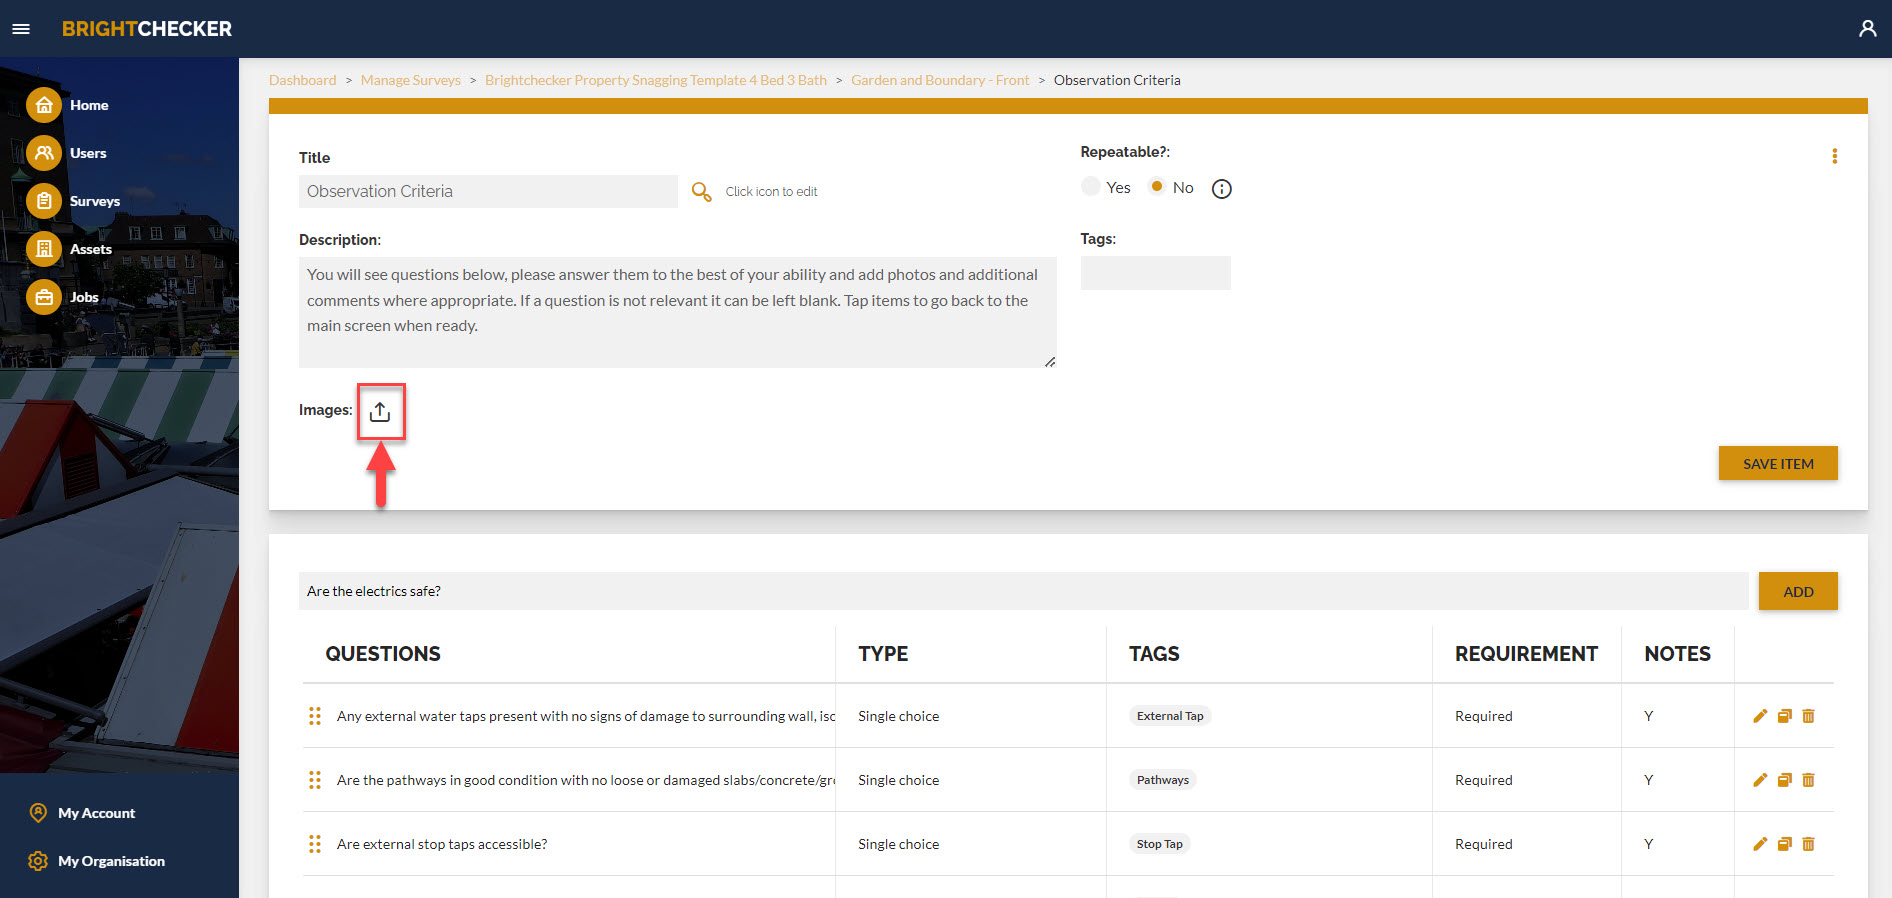
How to Add Item Guidance Photos #
Once you are at question level, the item header above will reveal the item ‘Add image’ option.
Click on the upwards arrow. Add one or more JPEG photos. Photos can be a maximum of 0.5MB.
You can delete photos by pressing the bin icon next to a photo.
Return To The Items Page #
At the top of the page, click on the section name that appears in the ‘breadcrumb’ navigation trail.
As a result you will be taken back to the items page (where all the items for the section you are working on are shown in a list).
‘Breadcrumb’ Example
In the screen shot below the breadcrumb trail is shown down to item level.
Dashboard>Manage Surveys>Brightchecker Snagging Template 4 Bed 3 Bath > Garden and Boundary -Front > Observation Criteria