Click on the topic you want to learn more about, alternatively scroll down the page.
My Branding – Benefits #
My branding settings accelerate report template creation.
From the Dashboard ‘My Organisation’ screen, look top right.
Settings #
- Logo
- Primary colour
- Secondary colour
- Accent colour
The primary, secondary, and accent colours are initially set to default Brightchecker branded colours. However, these can be easily changed as per the following instructions. Creating your own branding will simplify report production.
How To Set Up & Edit Branding #
- From the ‘My Organisation’ screen, click the pen icon to the right of the ‘My Branding’ header to update key details.
![]()
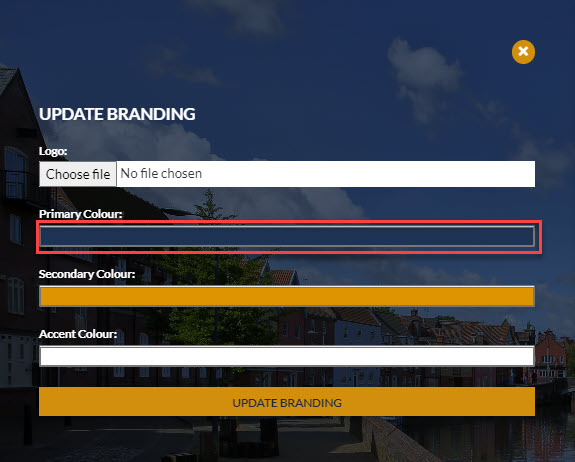
- The UPDATE BRANDING SIDEBAR Opens. If the sidebar was opened by accident, click the x button to close.

- To upload a logo click on ‘No File Chosen’
![]()
- Select a logo from your storage files
- To set a Primary Colour. Click on the Primary Colour
- As a result the Colour Picker Menu opens.
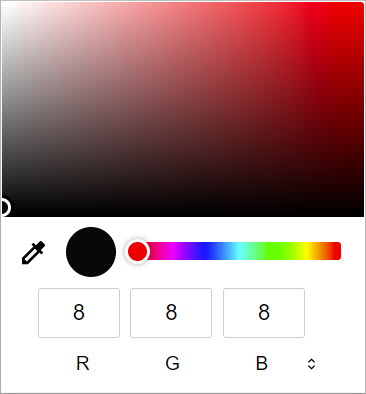
Set a colour by one of these methods:
- Type in the RGB colour.
- Click the up and down arrow (to the right RGB) twice to reveal the Hexadecimal box. Type in the hexadecimal code.
- Click on the colour picker, then click a colour to sample it.
- Click and drag the slider bar. Click on the circle in the colour tone box and drag to position.
Other Colours:
- To set a Secondary Colour, Click on Secondary colour and then follow Primary Colour setting guidance.
- To set an Accent Colour, Click on the Accent Colour and then follow Primary Colour setting guidance.
Update Branding #
- To save My Branding settings. Click ‘Update Branding’.
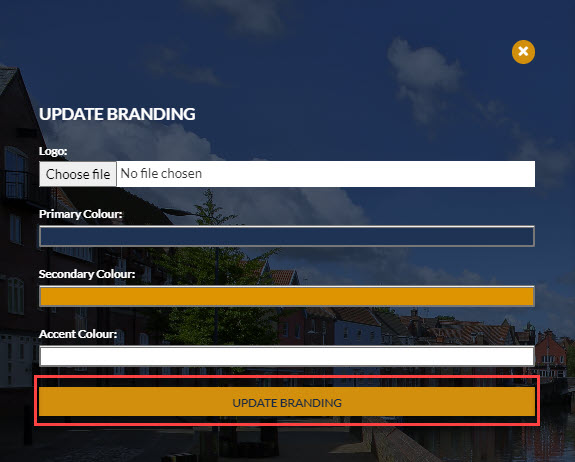
- As a result the sidebar will automatically close.