- Overview
- Where To Start
- Use An Organisation's Report Template
- Use A Master Report Template
- Set Report Template Contents
- View Report (From The Report Builder Screen)
- View Report (From The Reporting Sidebar)
- More Than One Report Template?
- How to Remove A Report Template From A Job
- Create A New Report Template
- Useful Links
Click on the topic you want to learn more about, alternatively scroll down the page.
Overview #
- To produce a final report for a job, you need to associate a report template with a job.
- You can use report templates that you build, or you can use a master report template (that complements a matching master survey template).
- You will need to set what sections/items need to appear in the report.
Where To Start #
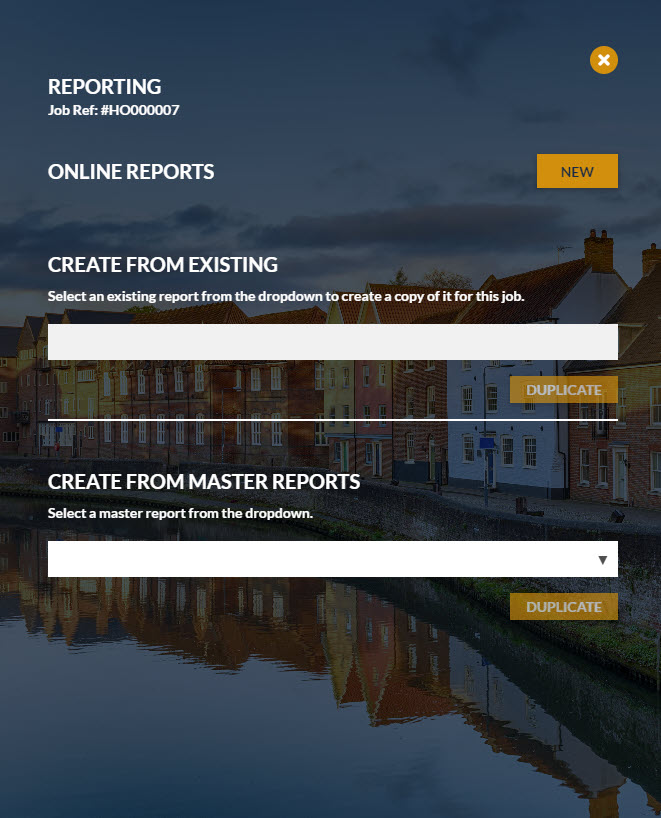
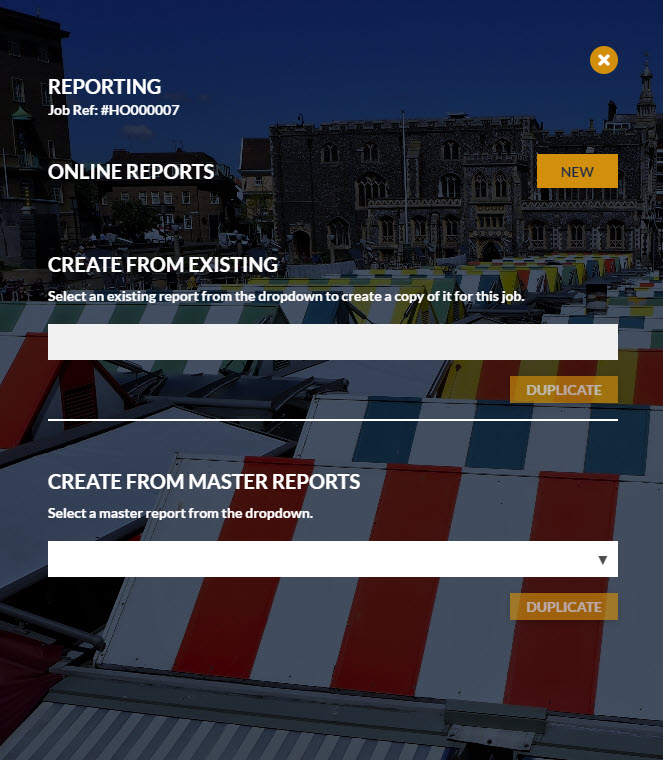
From The ‘Job Reference’ Review screen (from which you wish to produce a report from) click the ‘Reports’ button.

As a result the ‘Reports’ sidebar opens.
Use An Organisation’s Report Template #
From a Reporting Sidebar:
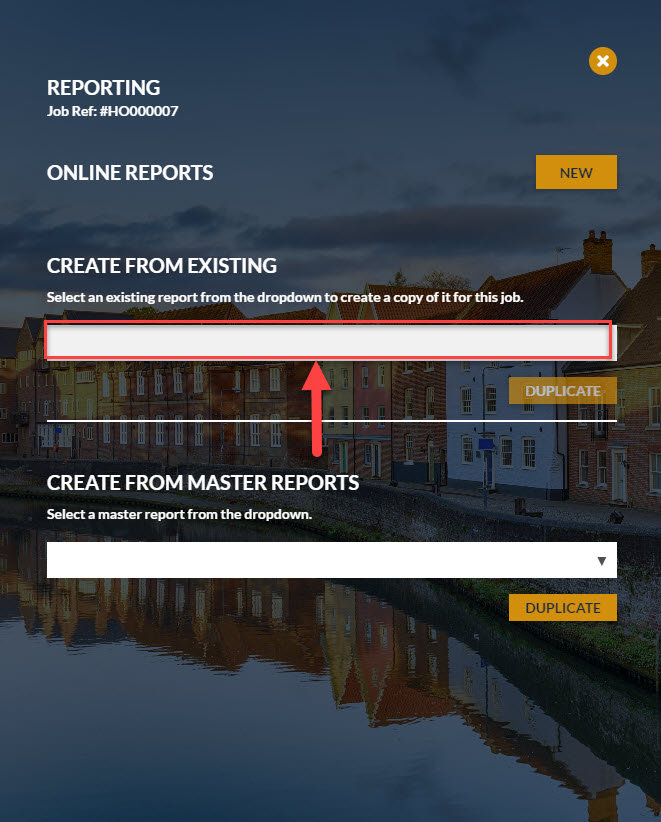
- Click on a report. As a result it will populate the box.
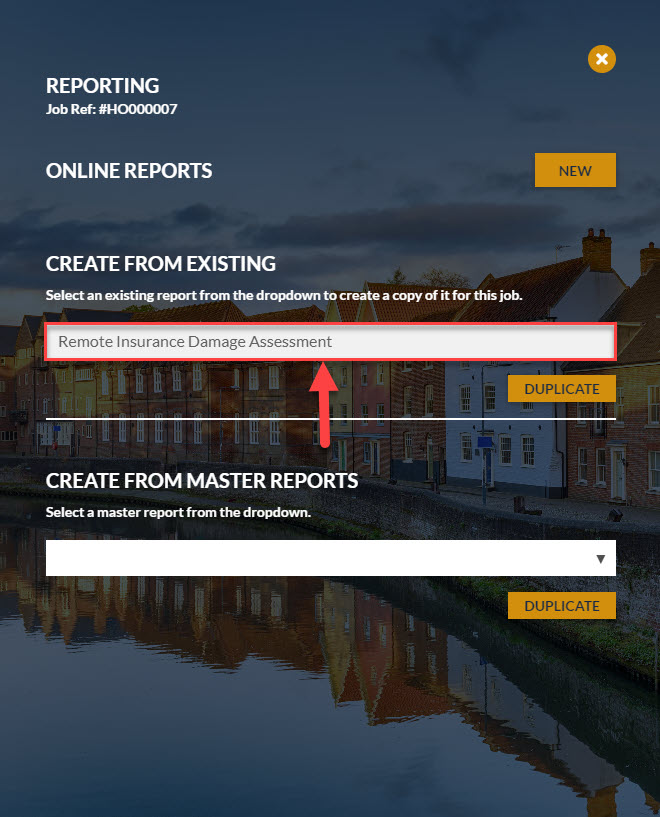
- Click ‘duplicate’.
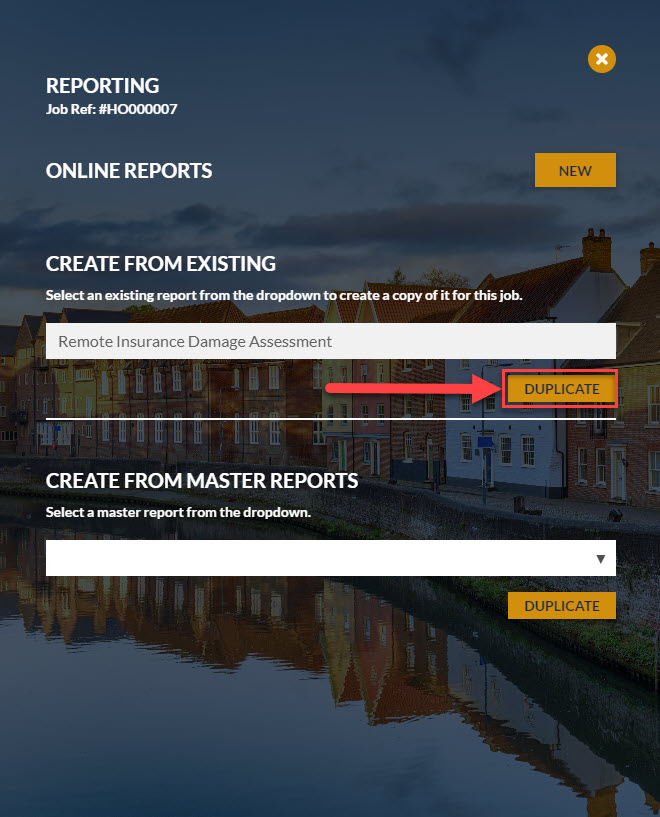
- As a result, a copy of the Report template will appear underneath ‘ONLINE REPORTS.
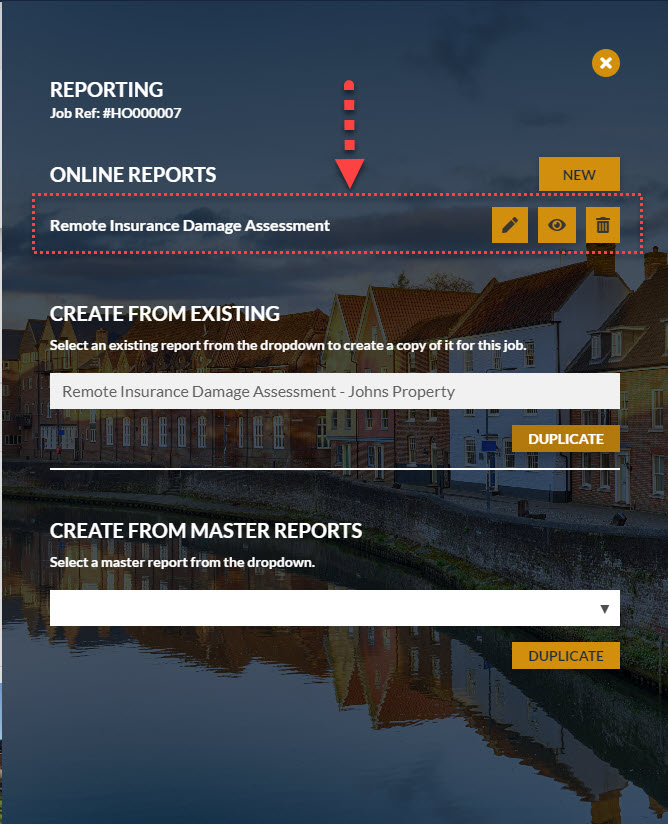
Note: Alternatively, start typing the name of the report template you want to use, and the system will display the best report template matches.
Use A Master Report Template #
In order to get you going quicker we have supplied several Master Report Templates.
The Screenshots below illustrate the process of attaching them to your job.
You can rename them and/or modify them them once they are attached to your job.
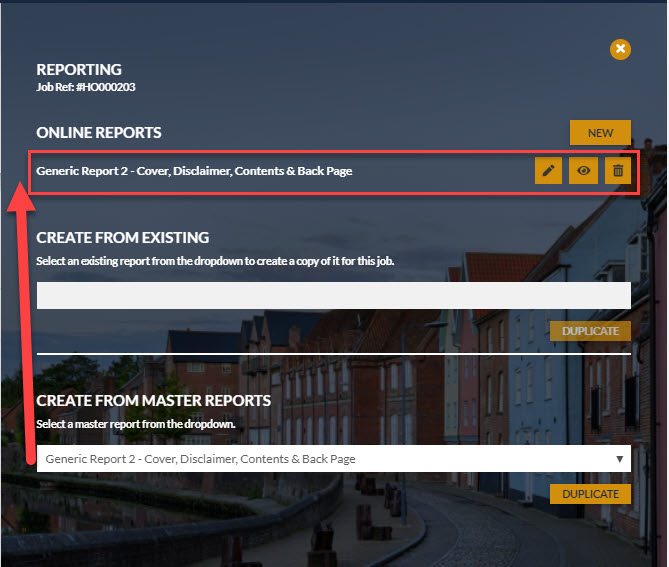
From a Reporting Sidebar:
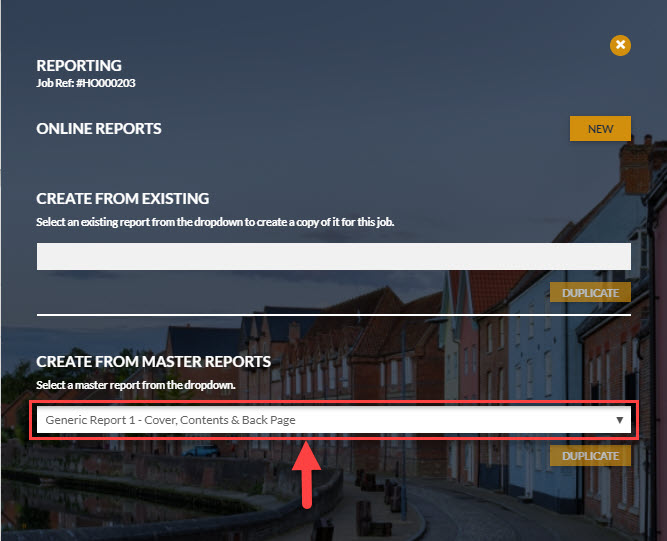
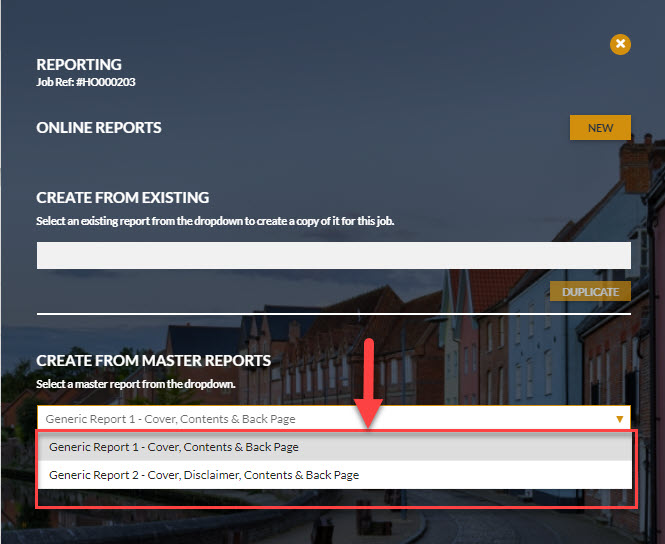
- Click the duplicate button under the drop down box selection ‘duplicate’.
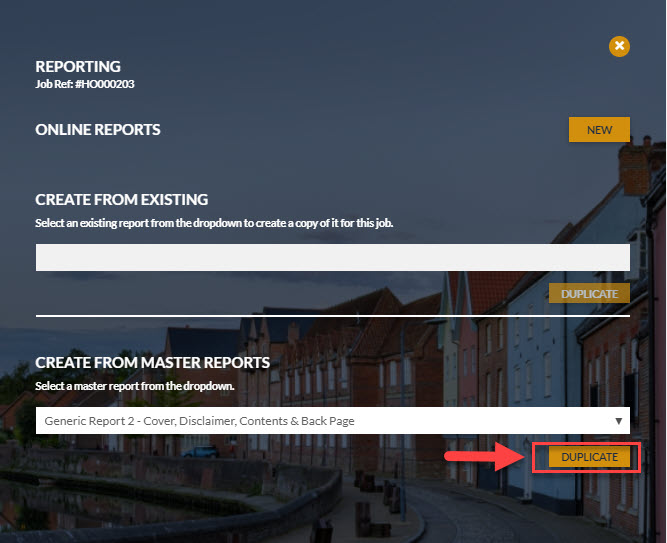
- As a result, a copy of the master report template will appear underneath ‘ONLINE REPORTS’.
Set Report Template Contents #
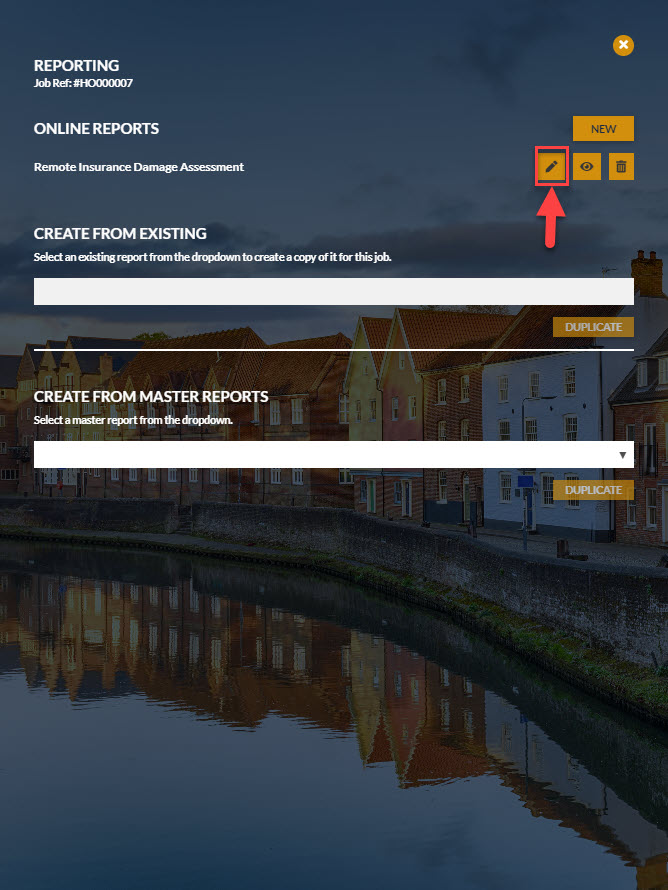
Make sure that there is at least one report template under ‘ONLINE REPORTS’.
For the report template you wish to use, click on the pen icon.
As a result the Report Template Screen opens. The Pages you see will depend upon the report template.
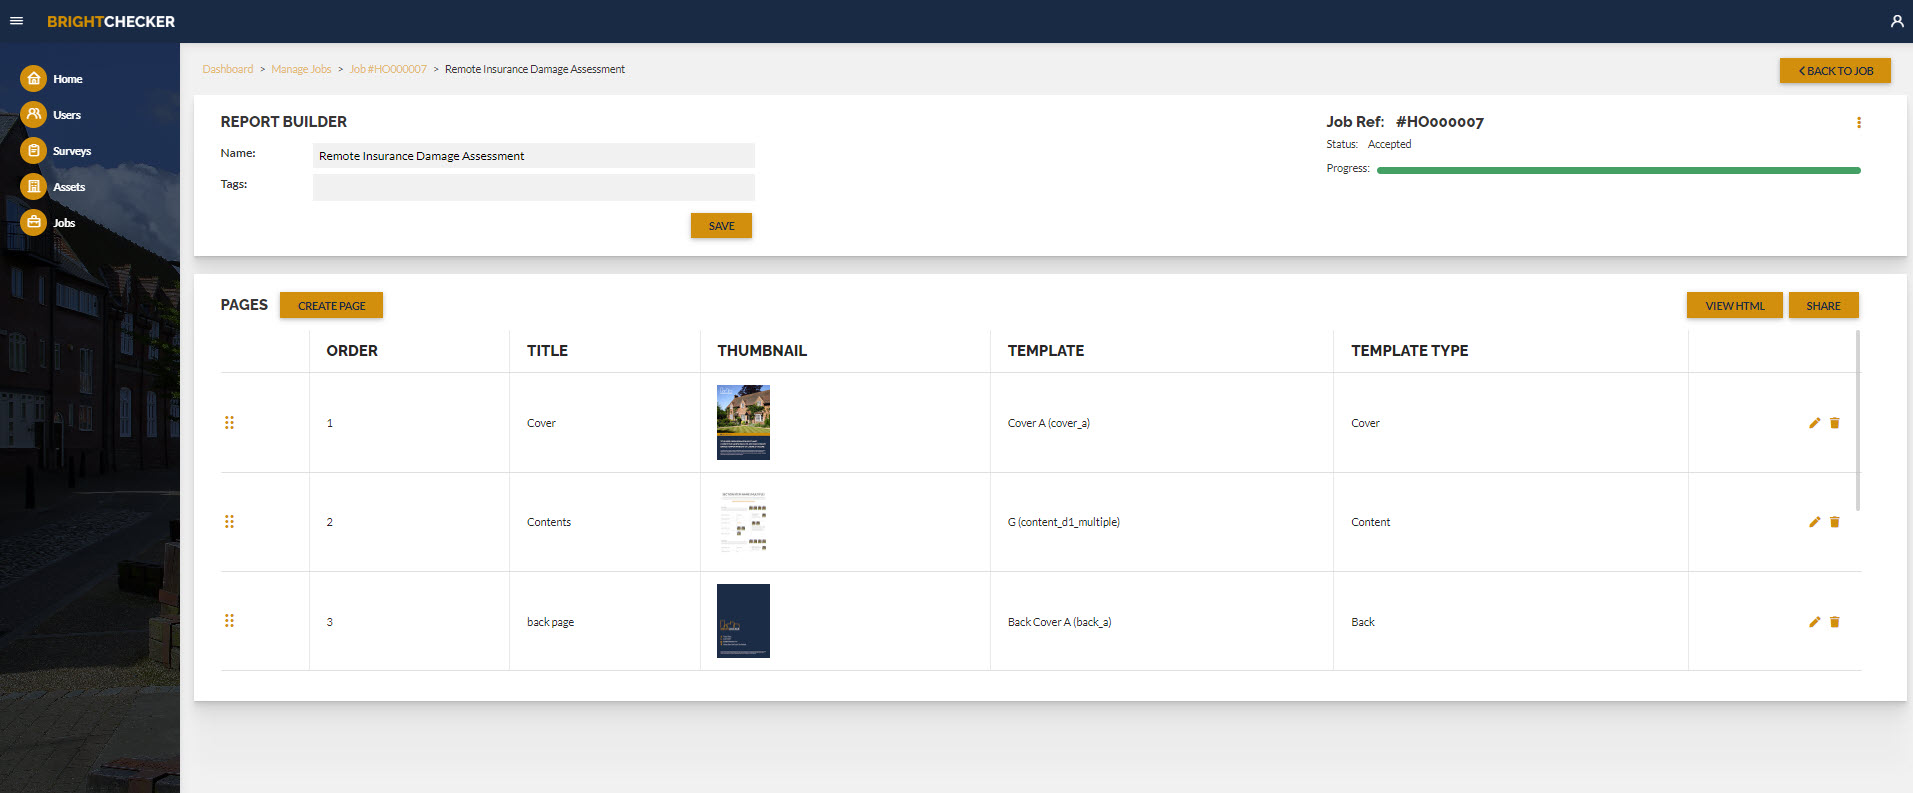
For every content page of the report template, click the pen item next to that content page.
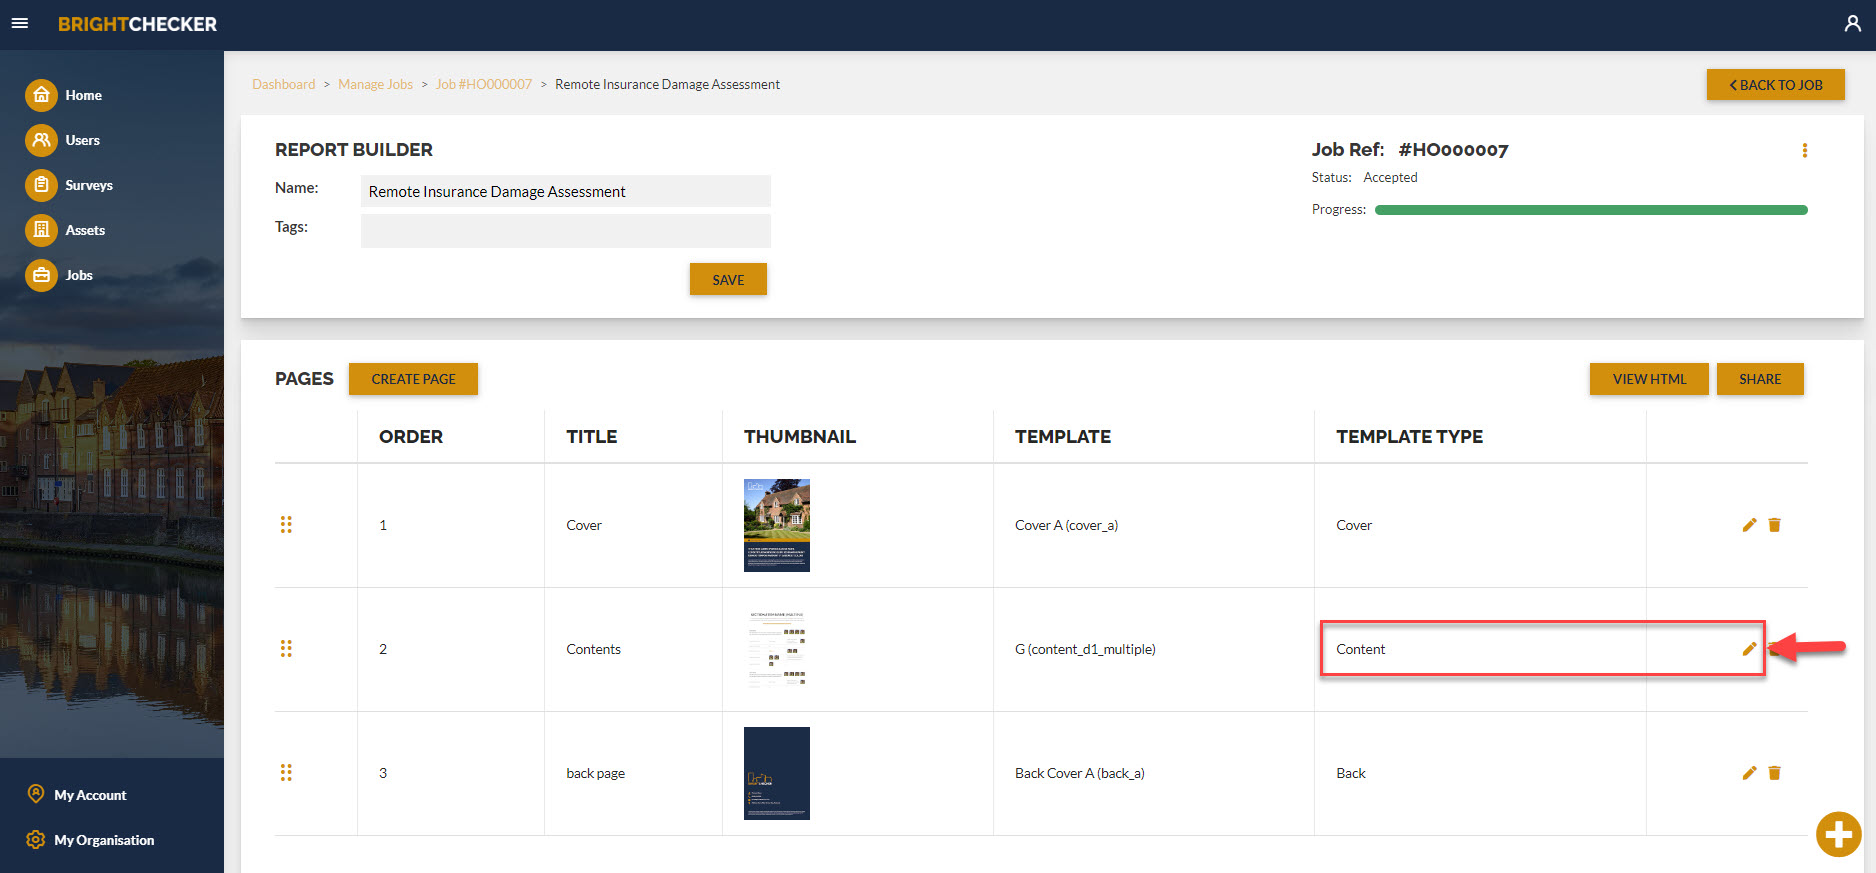
- As a result, the content page opens. Scroll down the contents page until you find the following settings.
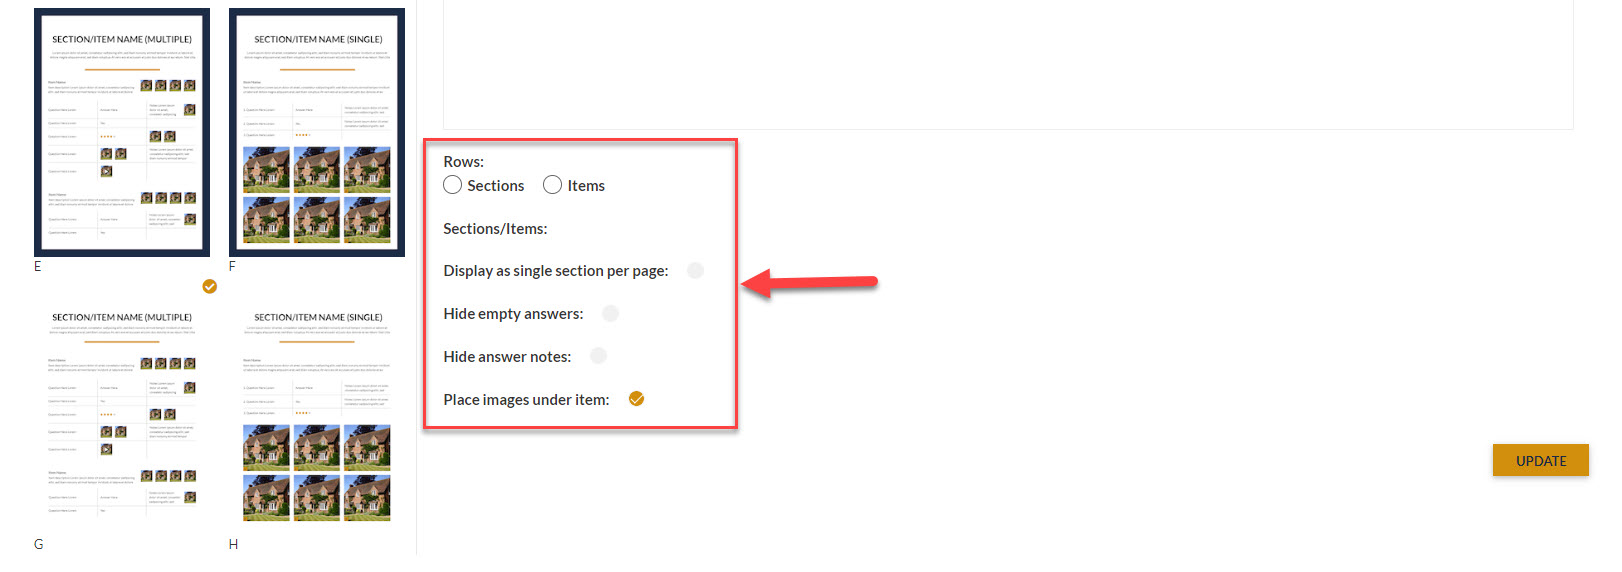
- Set report row display option to section or items. Sections is the most commonly used option.

- As a result a drop down box appears underneath the section / items buttons. Click on the drop down box.

- Click on the drop down box. As a result, several options appear in the drop down box. These will reflect the survey used for the job.

- If you have chosen Rows: Sections and you want to display every survey section click ‘Select All’.
- If you have chosen Rows: Items and you want to display every item click ‘Select All’.
- However, If you want to display one or more sections (or one or more items) click one or more individual options.
- Now consider the remaining the remaining settings.
- Click as required:
- Display as single section per page
- Hide empty answers
- Hide answer notes
- Place images under item (where present photos will appear in a block under each item)
- To update the contents page, Click ‘UPDATE’

- As a Result, the Content page is updated and you return to the report template page.
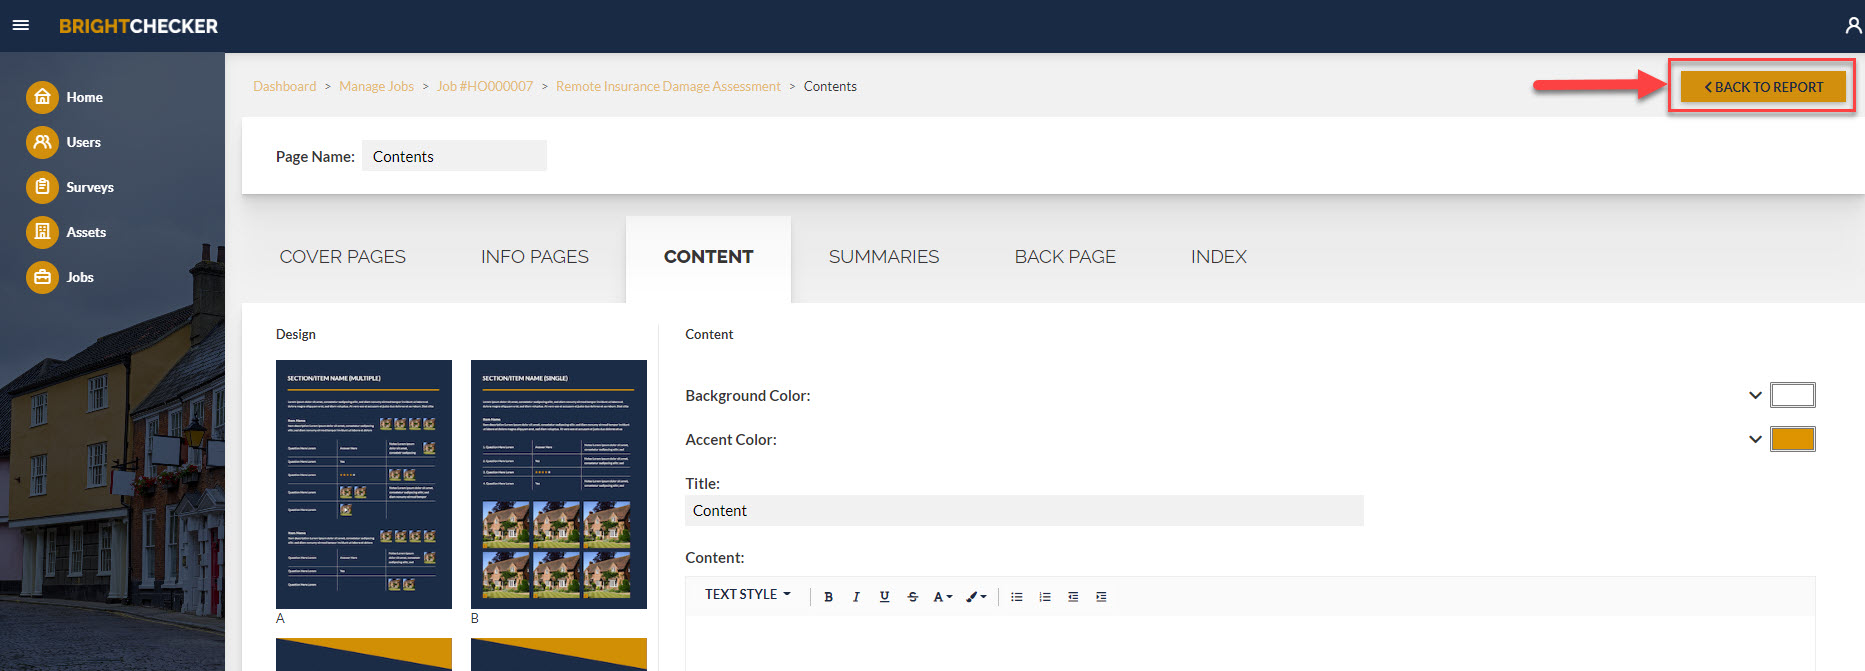
- Now click ‘BACK TO REPORT’ to return to the Reporting sidebar.
View Report (From The Report Builder Screen) #
Once you have completed setting the contents page(s) – which might be as simple as setting ‘Rows’ and ‘Select all’ – you can produce the populated online report.
From the report Builder screen , click ‘See Report’ to produce the populated online report.
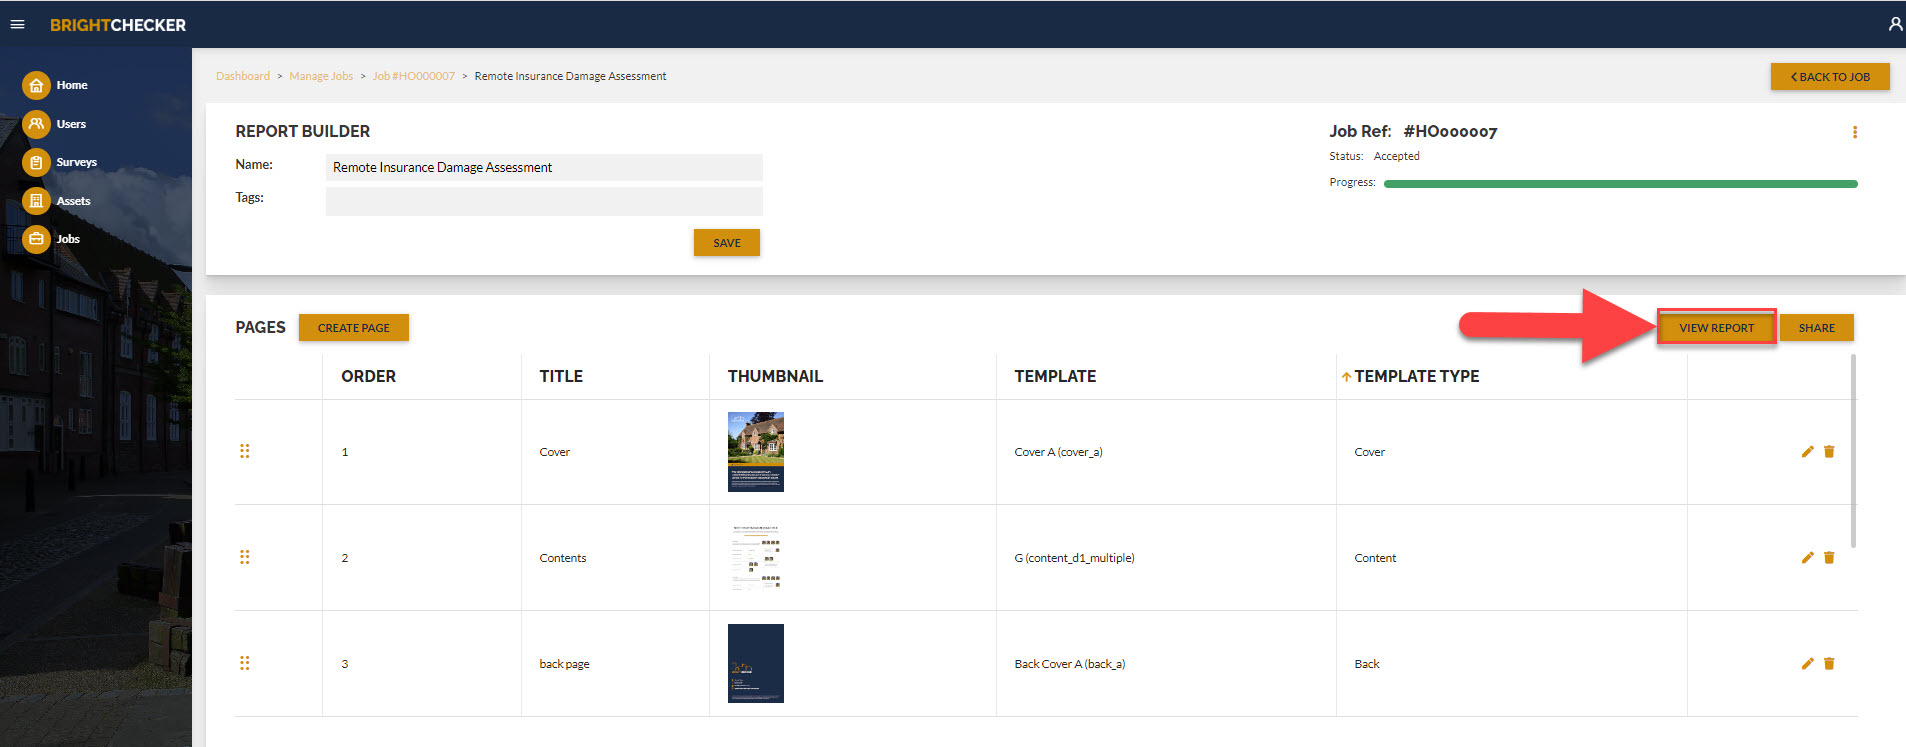
As a result a new browser tab will open, and the report can be seen.
View Report (From The Reporting Sidebar) #
Once you have completed setting the contents page(s) – which might be as simple as setting ‘Rows’ and ‘Select all’ – you can produce the populated online report.
From the reporting sidebar, click the eye icon to review a populated online report.
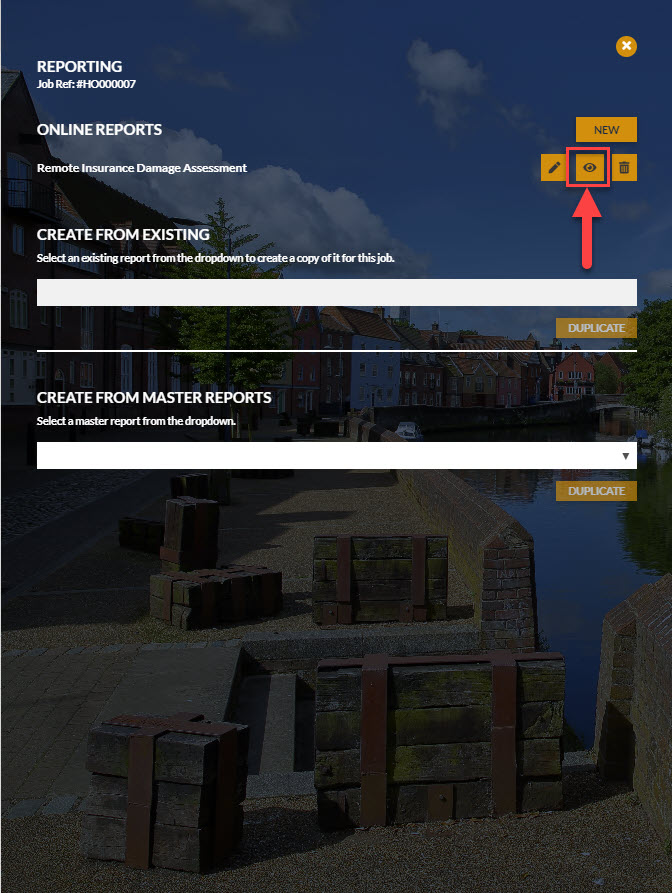
As a result a new browser tab will open, and the report can be seen.
More Than One Report Template? #
You can have more than 1 Report Template associated with a Job. That way you can have the same report with different branding, or even have a different display style. The choice is yours.
How to Remove A Report Template From A Job #
When a report template has been associated with a job, a bin icon will be visible.
Click the Bin icon to remove that report template from the job.
![]()
As a result the report template line (and associated icons) will disappear.
Create A New Report Template #
To create a report template from scratch, click ‘New’ – then follow the instructions in the article ‘Create Report Template From Scratch (Dashboard)’
Useful Links #
Check out the Brightchecker Knowledgebase Index
Register or Log in with the Brightchecker Dashboard
Read more about us at the Brightchecker Home Page
Here’s the feedback option for this Knowledge Base article, how did we do?


